Personal Project: Street Photography |
“Everybody Street illuminates the lives and work of New York’s iconic street photographers and the incomparable city that has inspired them for decades. The documentary pays tribute to the spirit of street photography through a cinematic exploration of New York City, and captures the visceral rush, singular perseverance and at times immediate danger customary to these artists. Covering nine decades of street photography, “Everybody Street” explores the careers and influences of many notable photographers––a number of whom have never been documented, featuring: Bruce Davidson, Elliott Erwitt, Jill Freedman, Bruce Gilden, Joel Meyerowitz, Rebecca Lepkoff, Mary Ellen Mark, Jeff Mermelstein, Clayton Patterson, Ricky Powell, Jamel Shabazz, Martha Cooper, and Boogie, with historians Max Kozloff and Luc Sante."
everybodystreet.com |
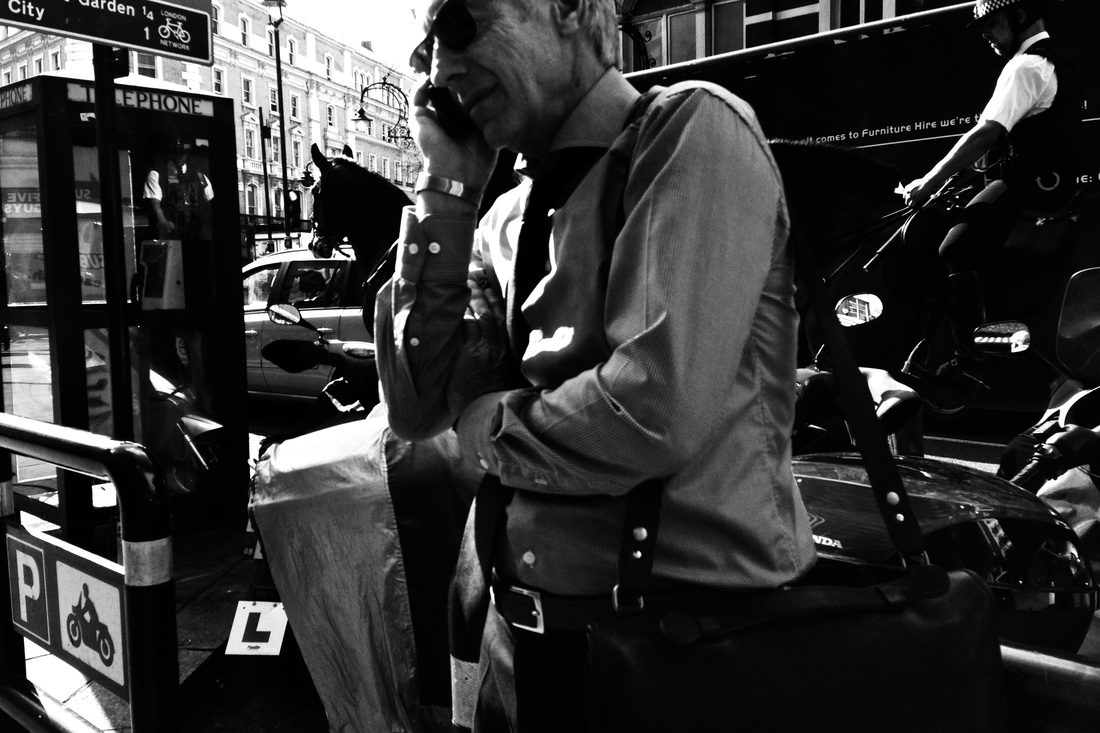
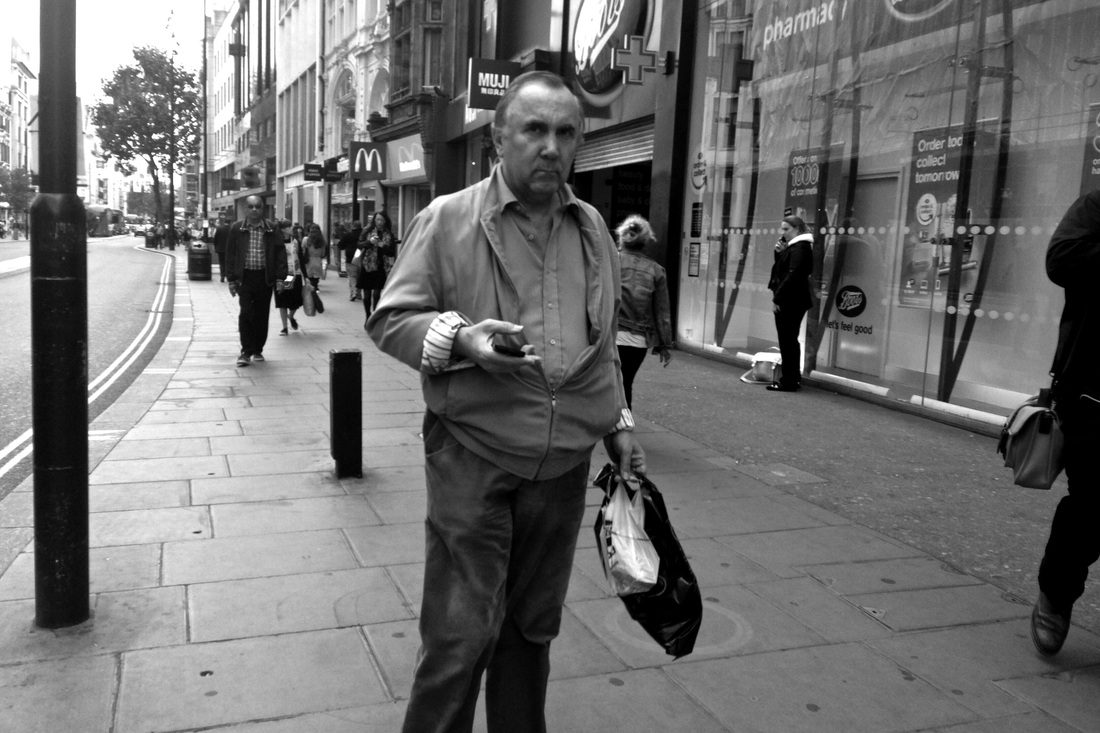
Joel MeyerowitzJoel Meyerowitz is a New York photographer. He began as a street photographer in the late 1960s. Originally working with black and white film, he also began experimenting with colour transparencies (slides). He was unable to print these images until much later due to the cost of creating dye transfer prints. His style combines sharp observation of people's behaviour on the streets with gentle, often surreal humour. He is drawn to odd gestures, colour combinations, signs and objects. His pictures are about the sudden surprise and pleasure of seeing through the camera lens. His most memorable pictures seem to have been grabbed from the chaos of the streets.
|
|

Image analysis: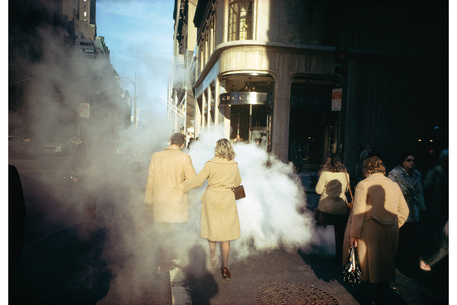
|
|
- If you had to give the photograph a title (other than the one it might already have) what would you call it and why?
- If you could ask the photographer 2 questions to help you understand the image better, what would they be?
What I learned about street photography from the film 'Everybody Street'
- How do street photographers behave?
- What kind of equipment do they use?
- What kinds of subjects interest them?
- Why do they like photographing on the street?
- What are the risks involved in street photography?
- What makes a successful street photograph?
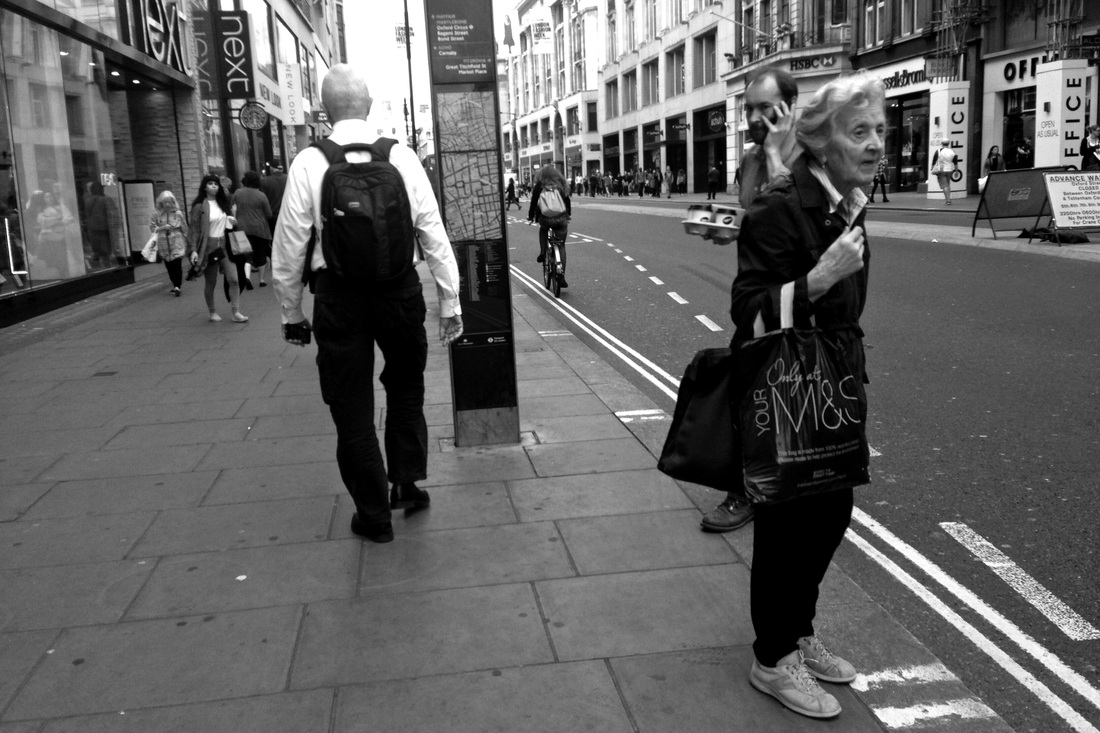
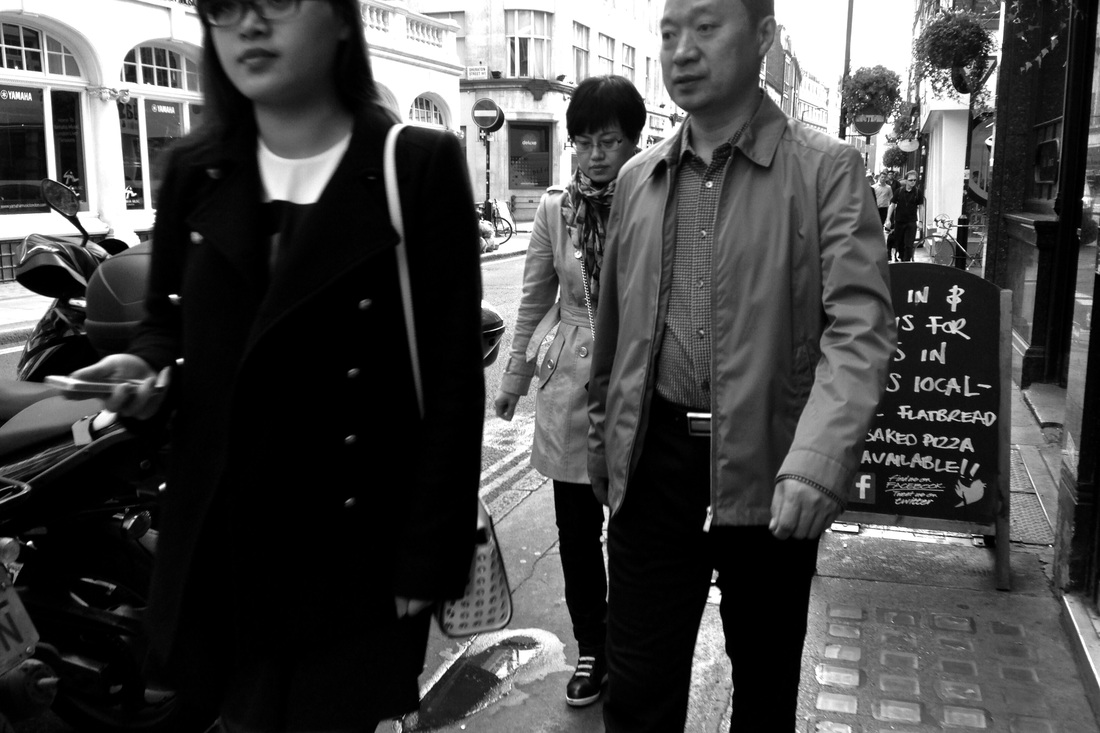
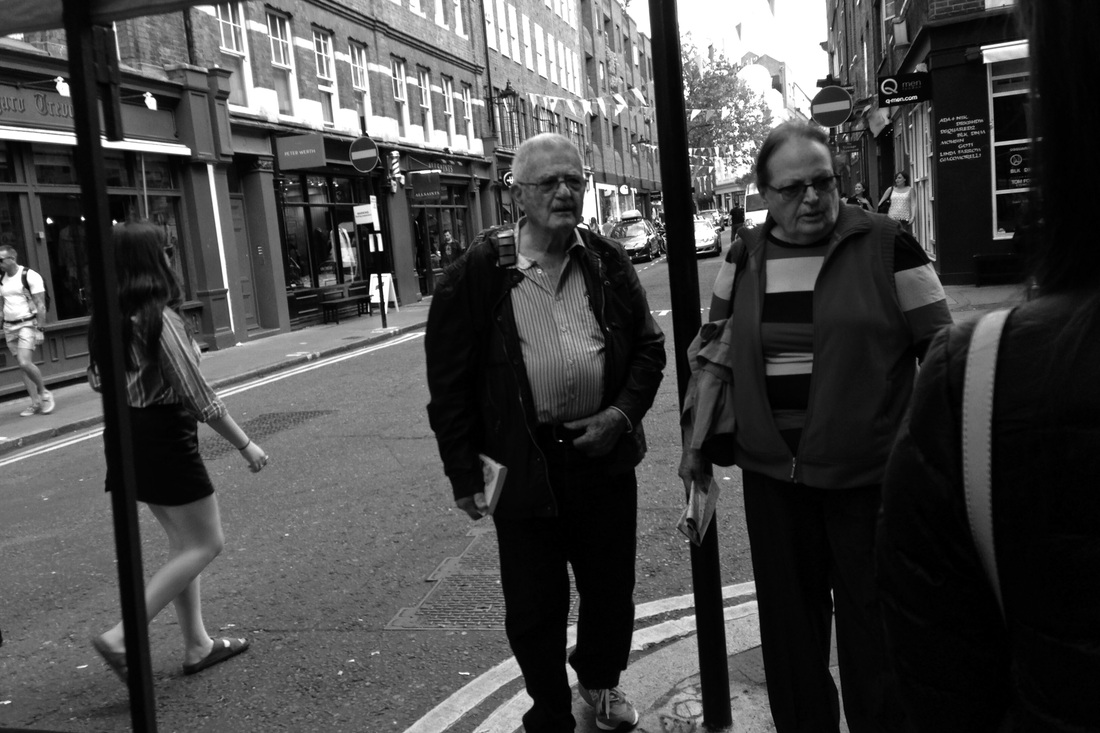
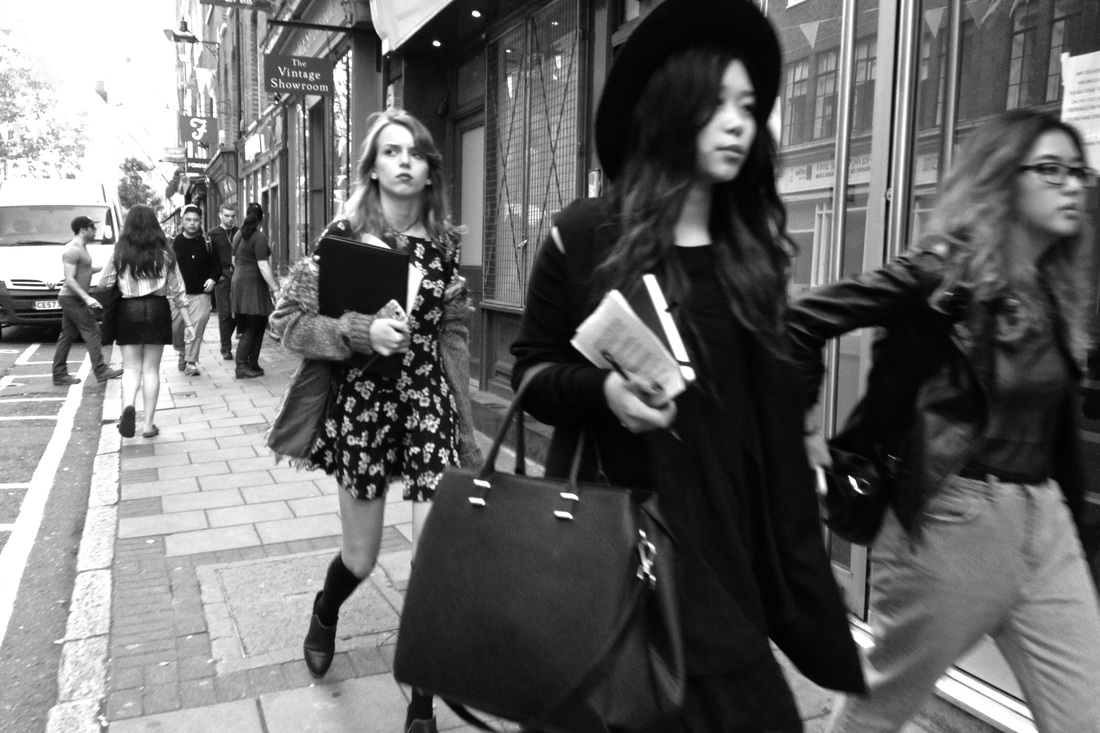
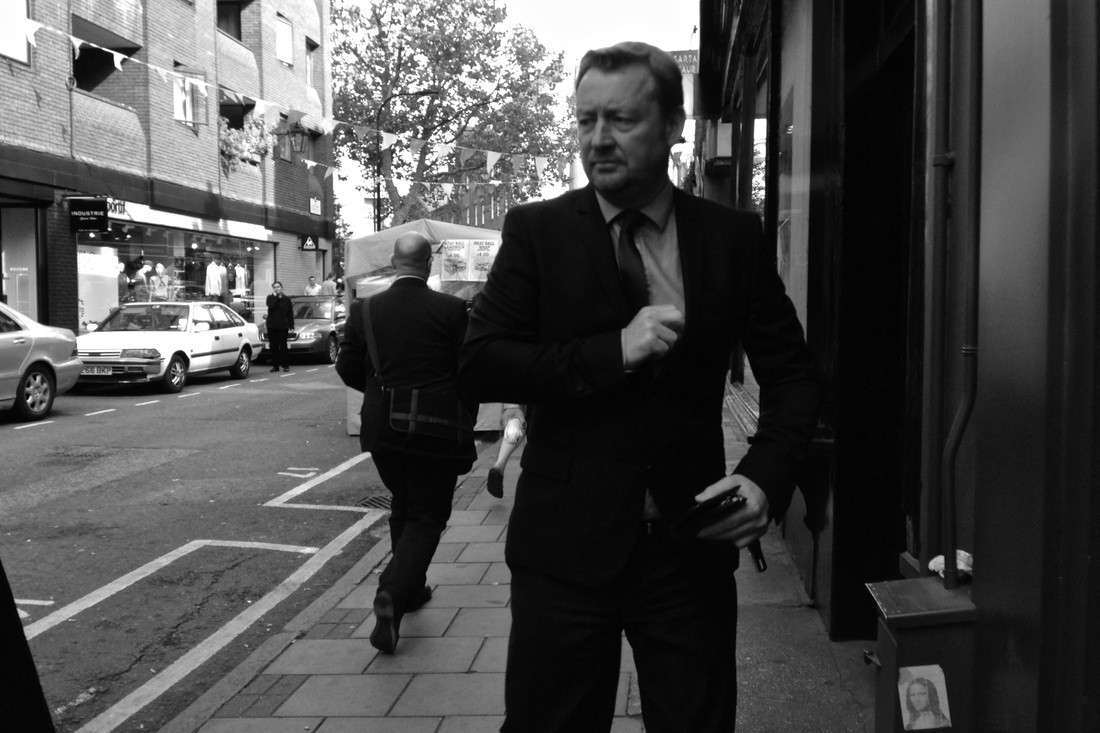
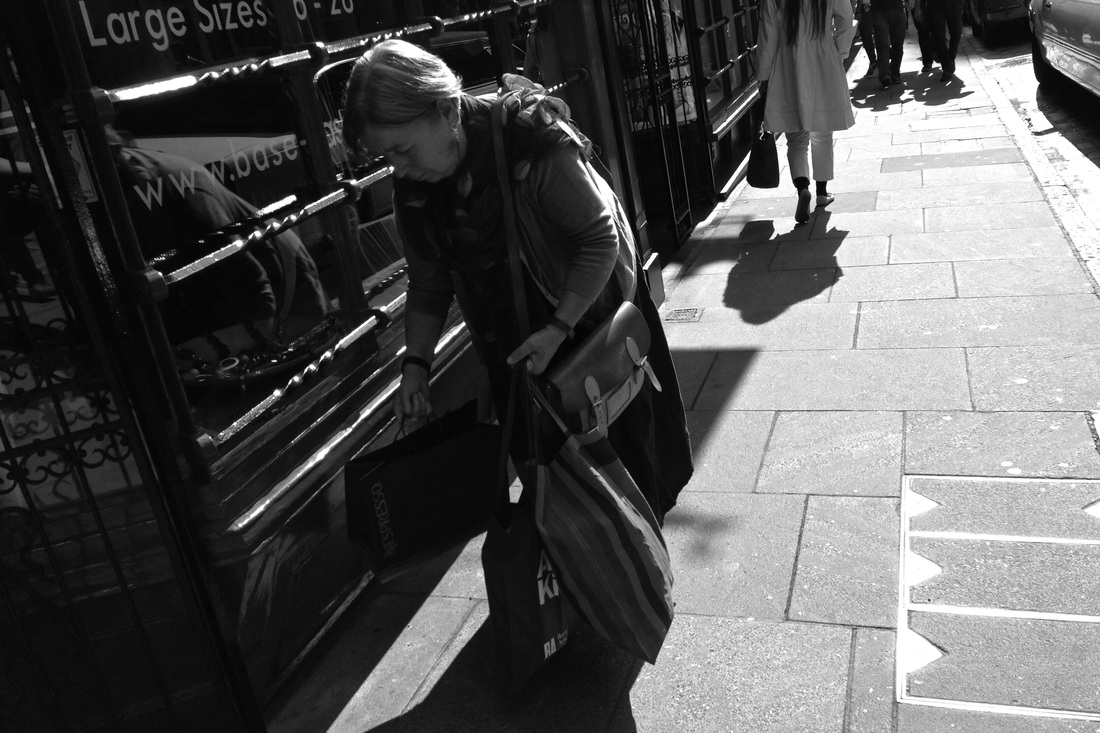
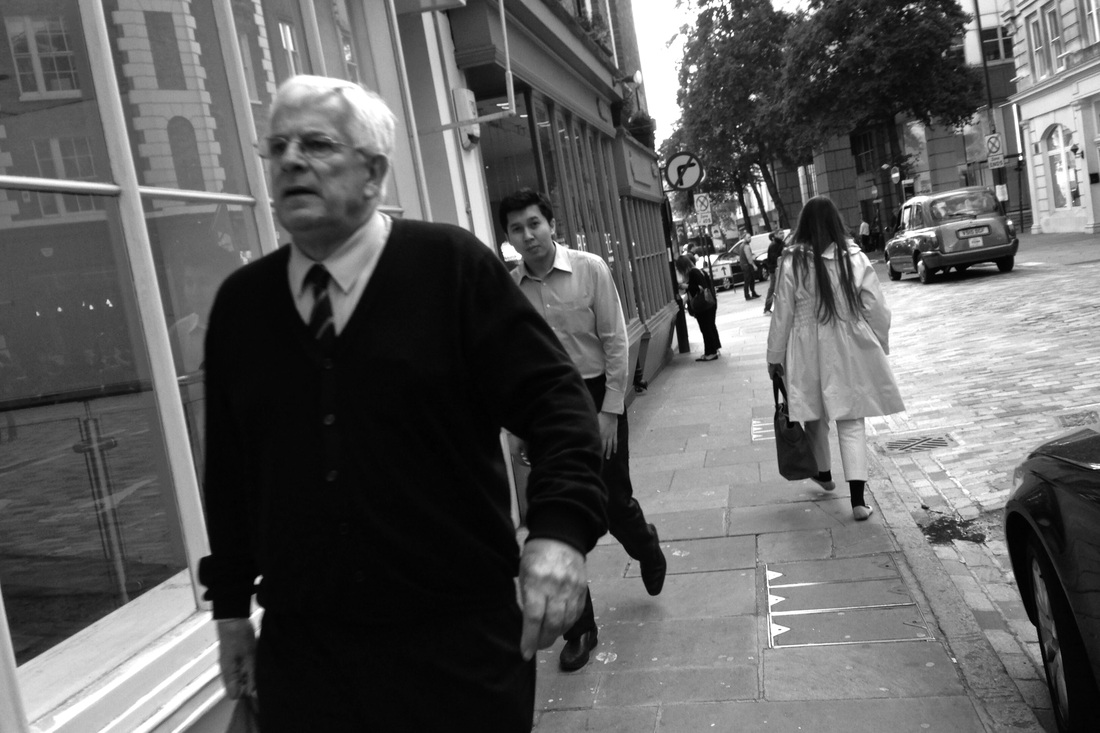
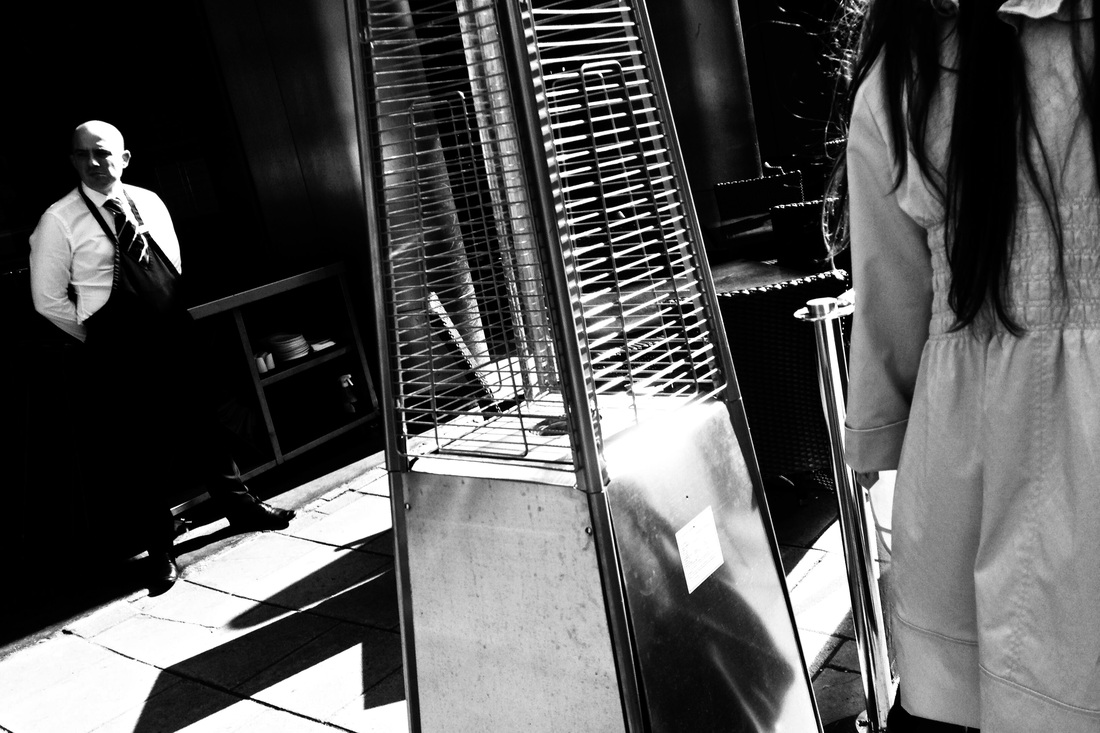
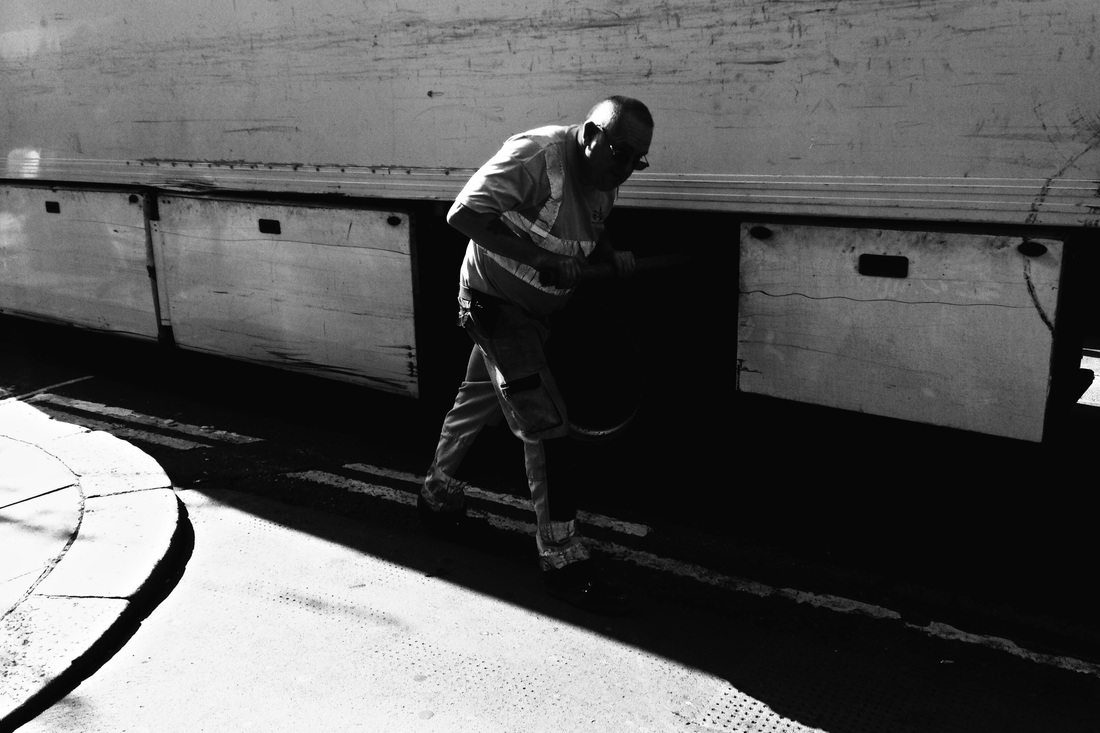
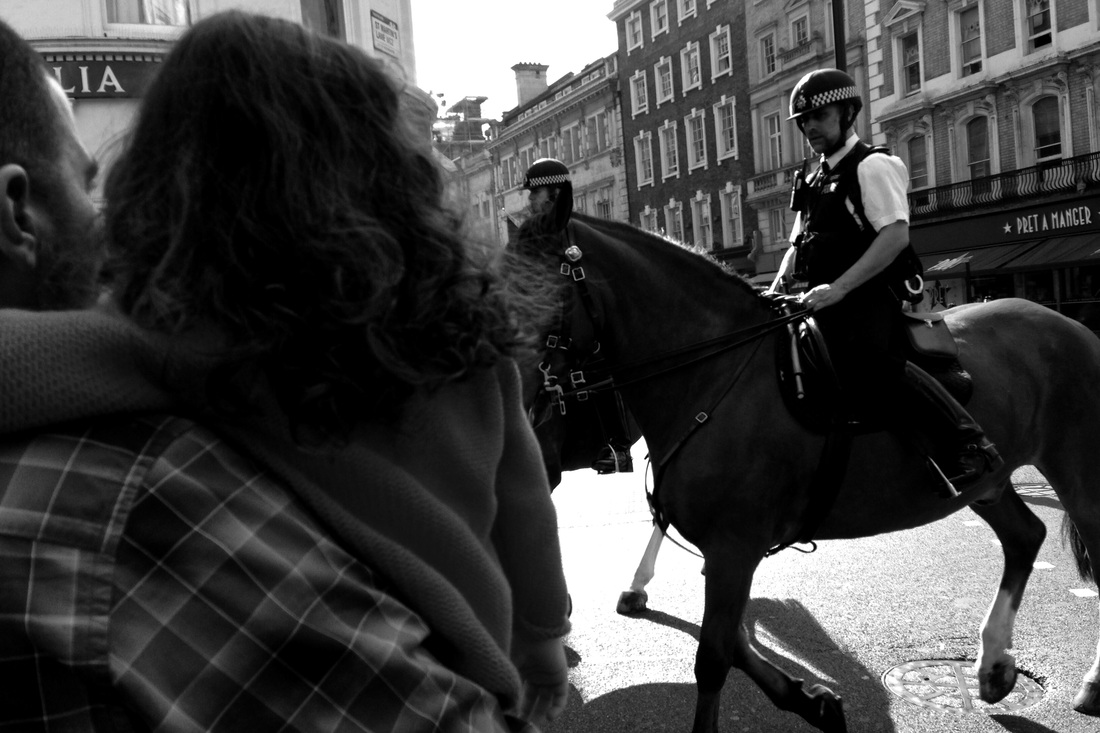
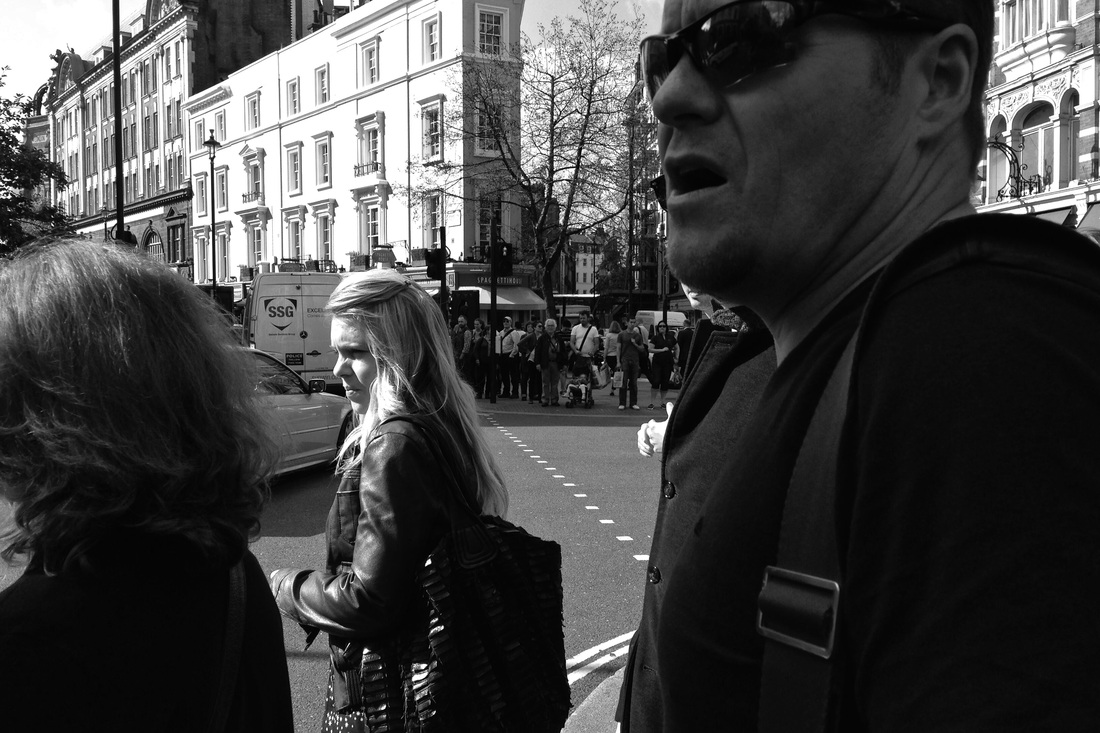
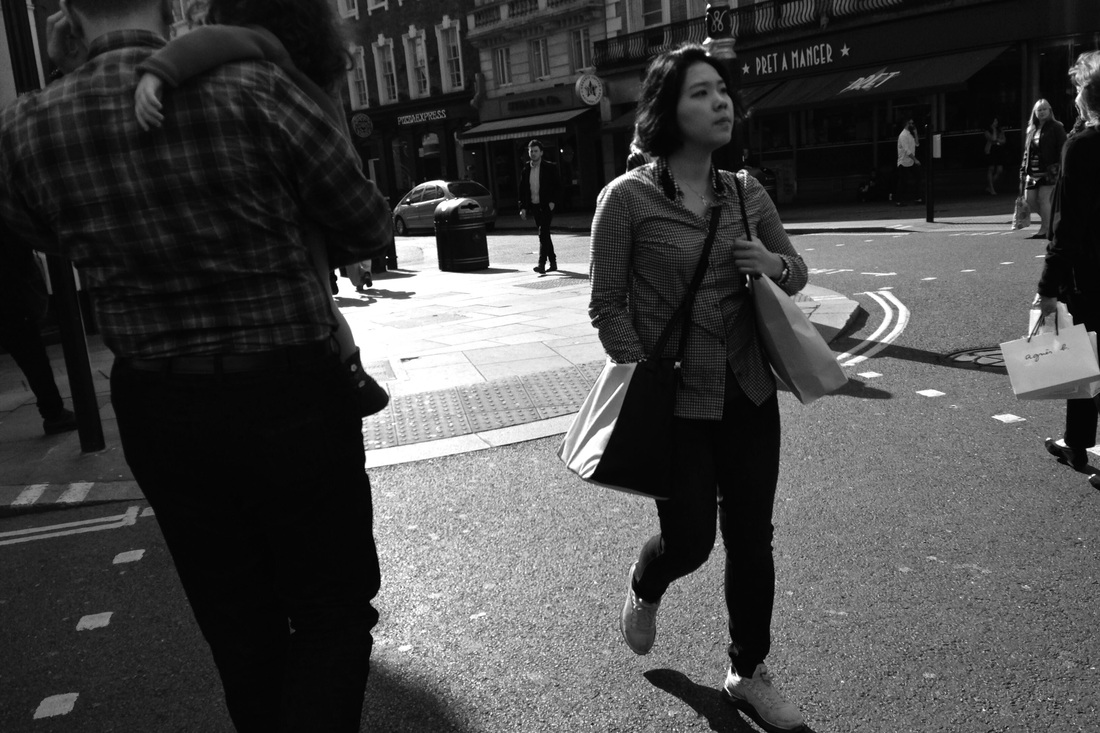
Photo Challenge #1 - Ways of Seeing
Take a look at these examples of street photography. Your challenge is to respond to these examples by creating images of your own that borrow these viewpoints, subjects and compositions.
|
|
|
|
|
|
|
|
|
|
|
|
|
|
|
|
|
|
My Second Set of Pictures
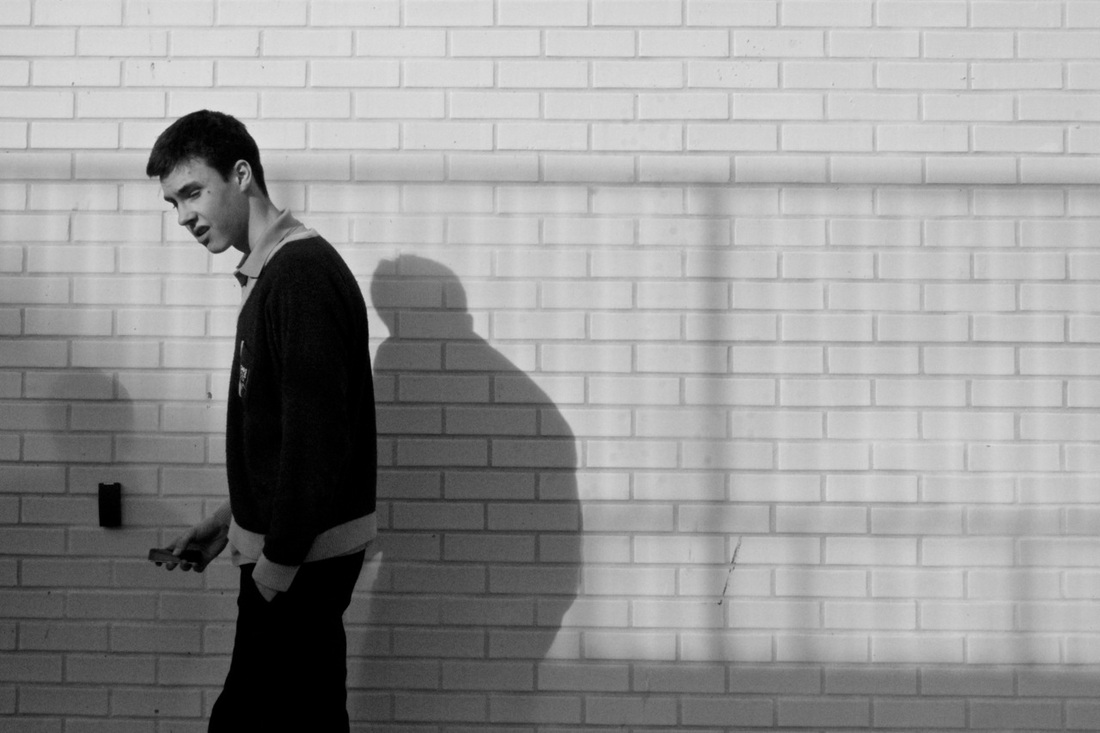
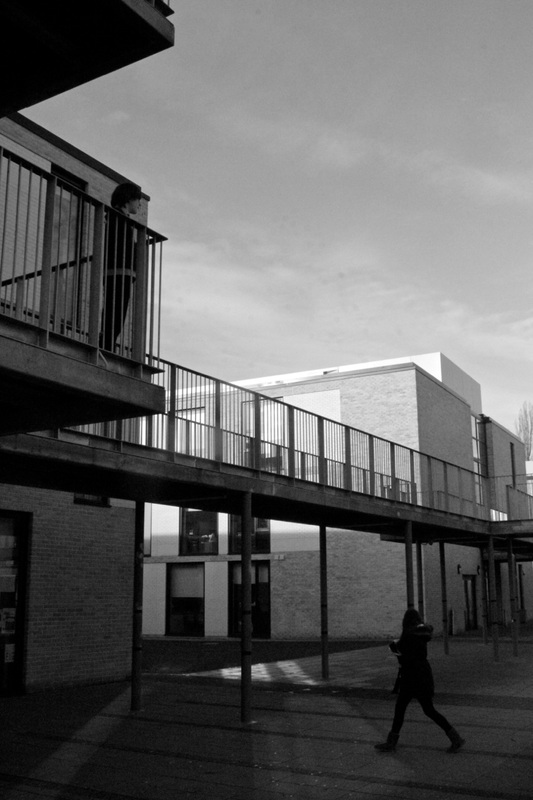
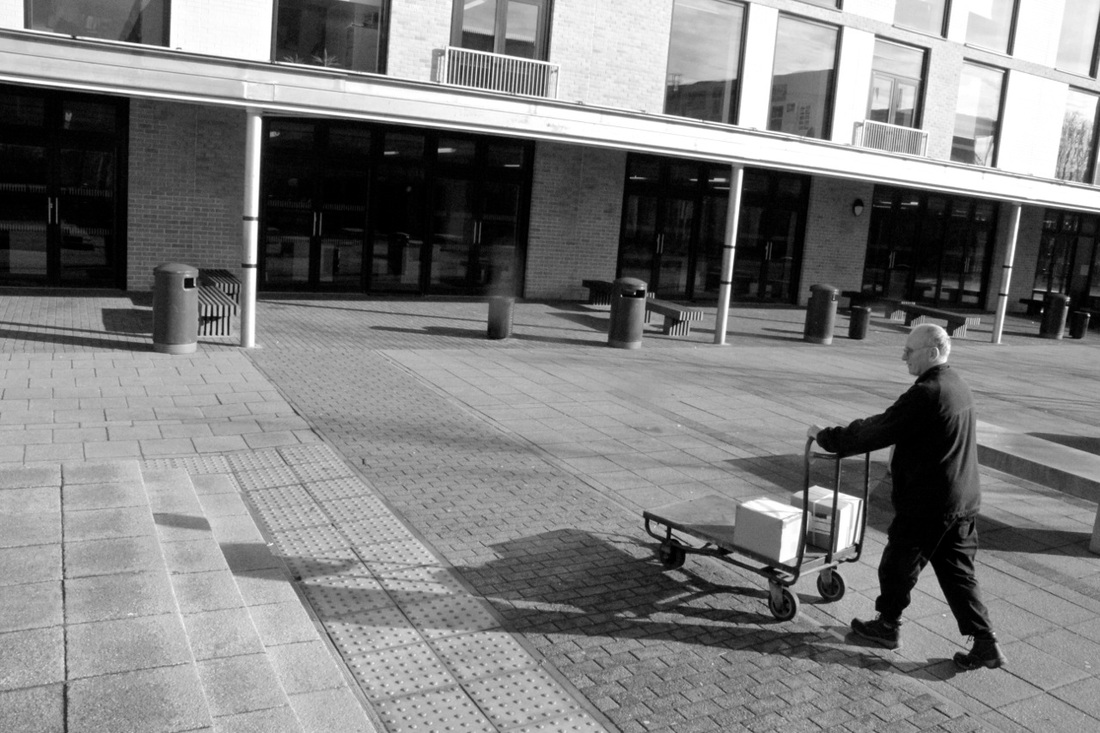

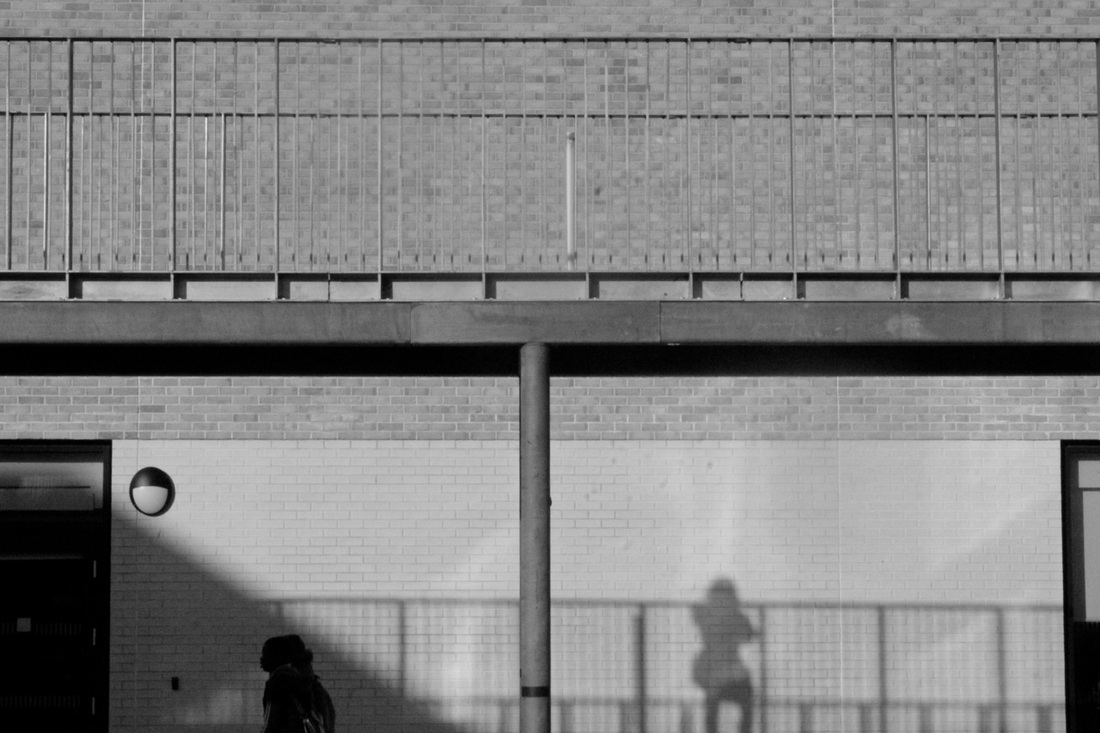


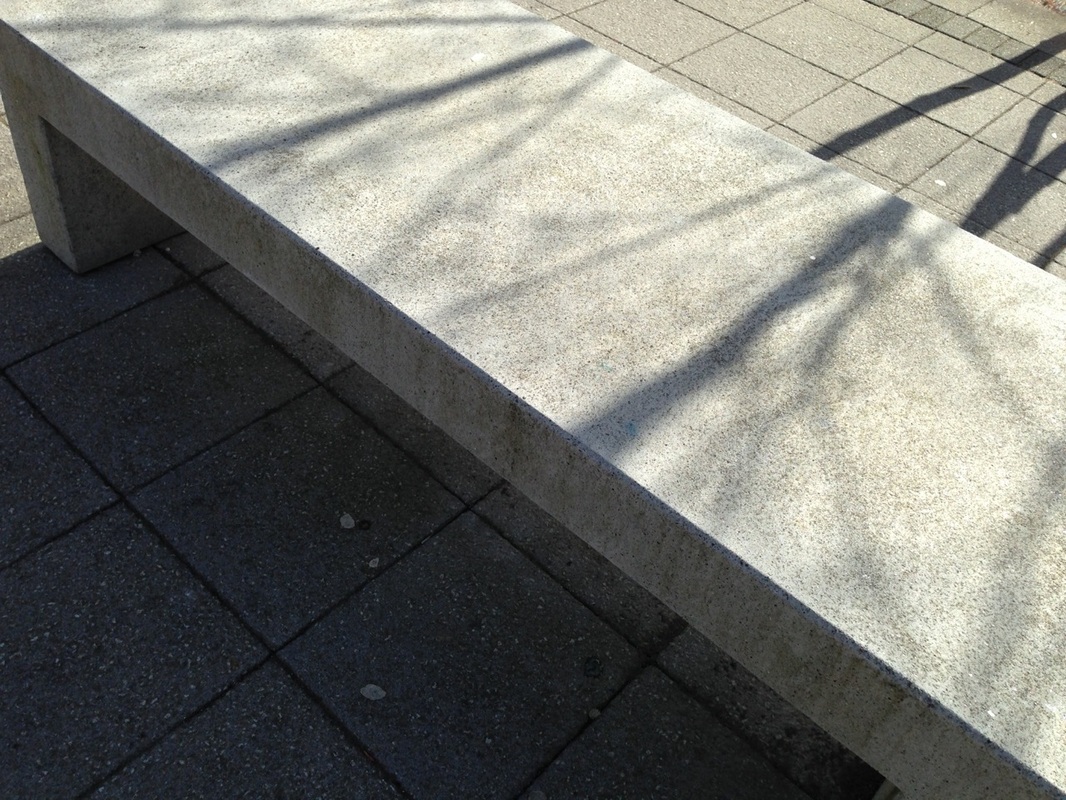
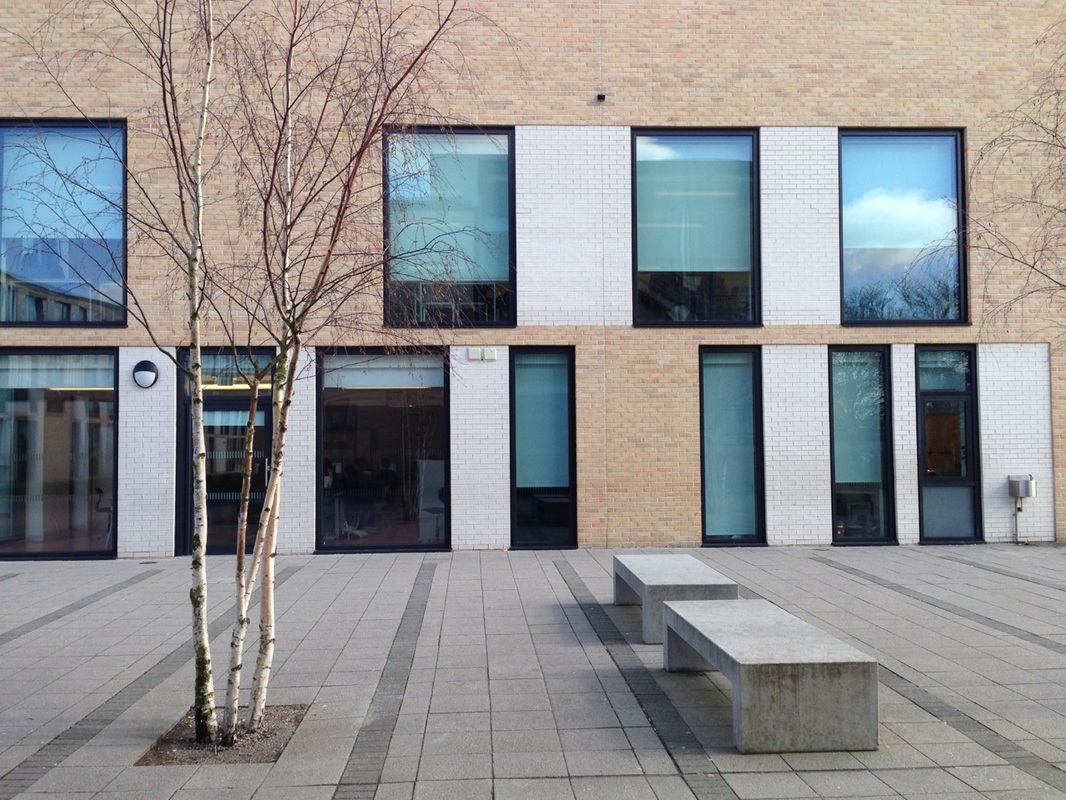
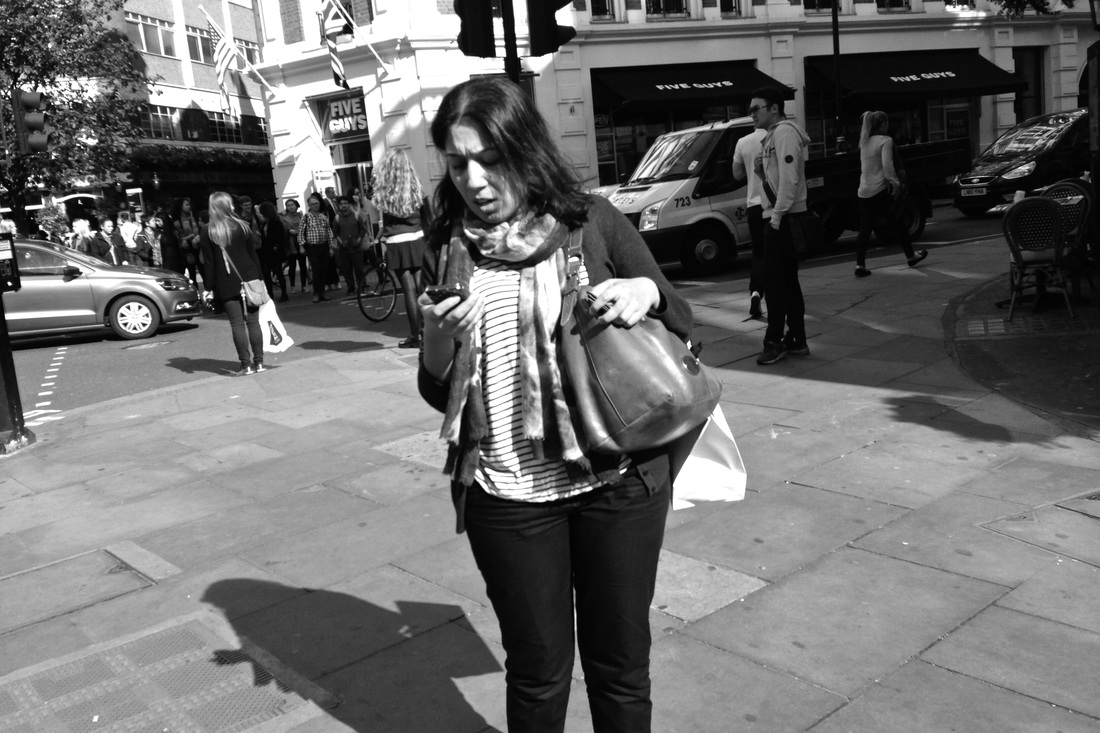
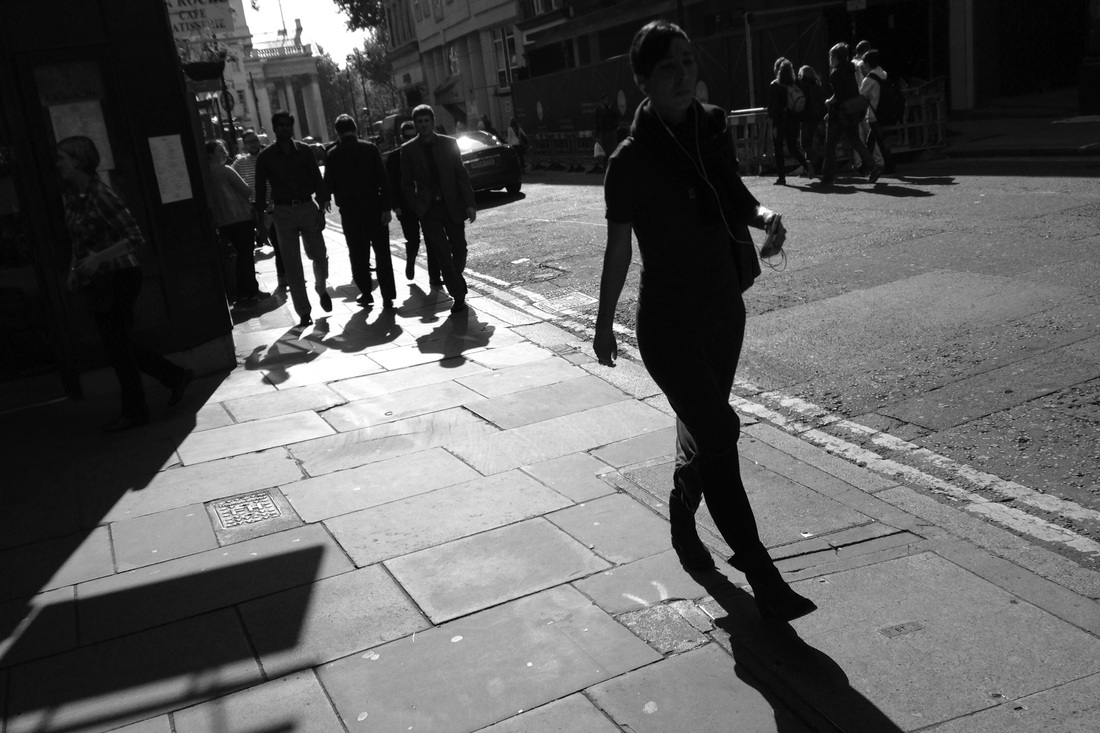
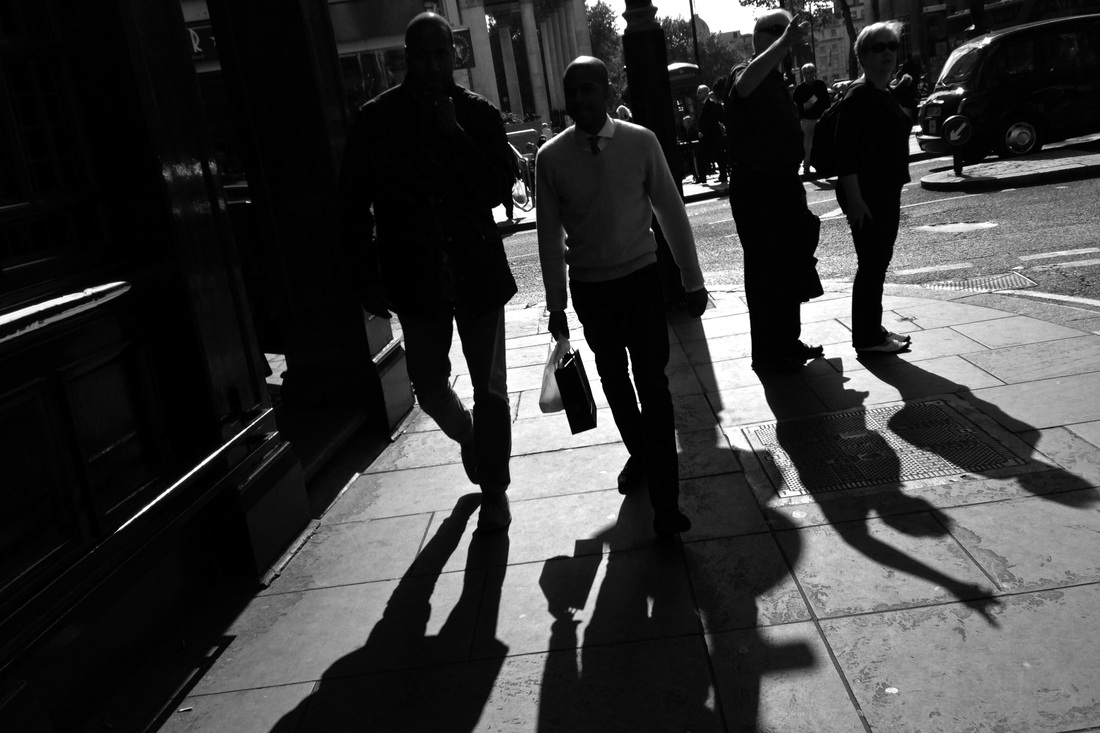
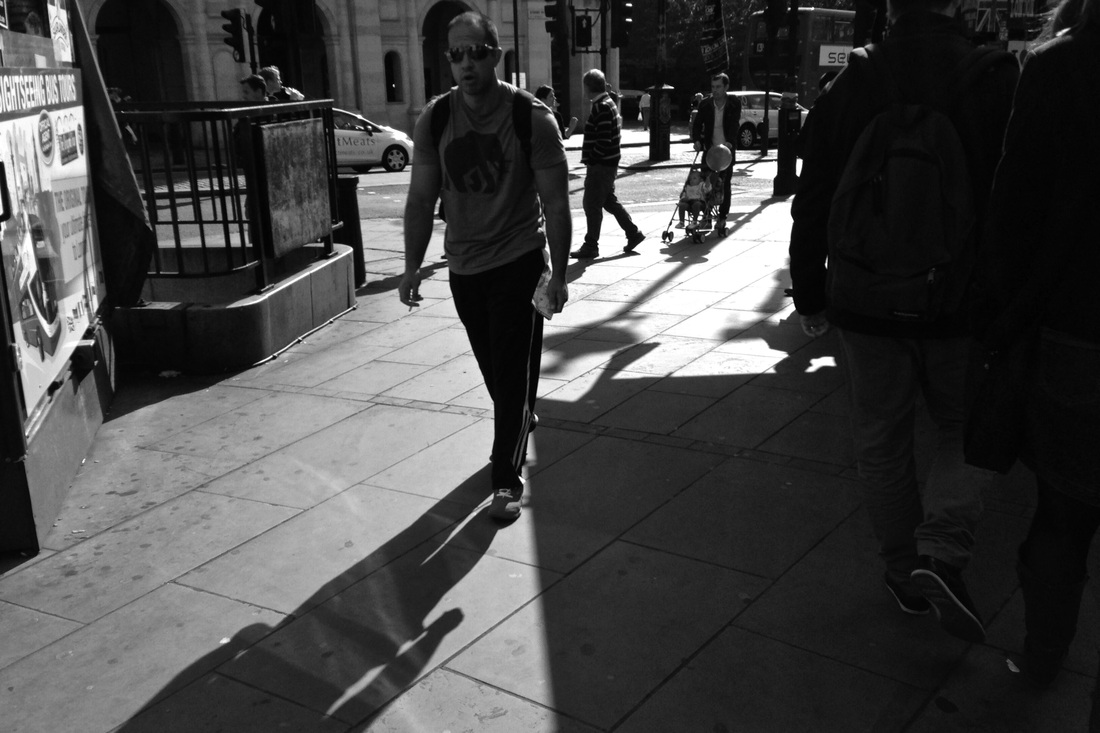
These images were taken on a Canon DSLR with an 18-55mm lens. For most of the pictures I set the lens to a wide angle between 24 and 35mm. I wanted to include as much of the subject as possible. I photographed students moving around school. The sun was fairly bright so there were some shadows and I tried to take some pictures where the figures were silhouetted against the sky. I didn't check the ISO setting on the camera at the start and only noticed that it was too high (1600) about half way through the shoot. This explains why some of the pictures are too 'noisy'. Once I had downloaded them to my computer I decided to convert them to black and white. There isn't a lot of bright colour in school so it made sense to think of the images in terms of tonal contrasts.
|
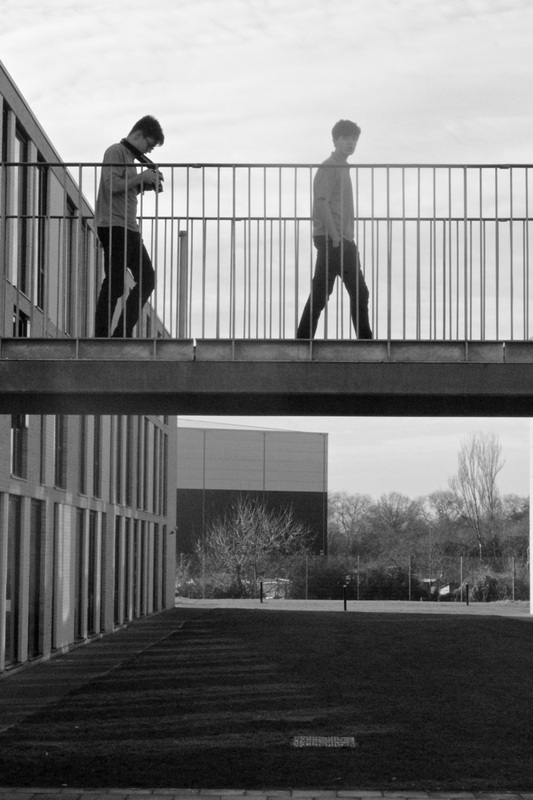
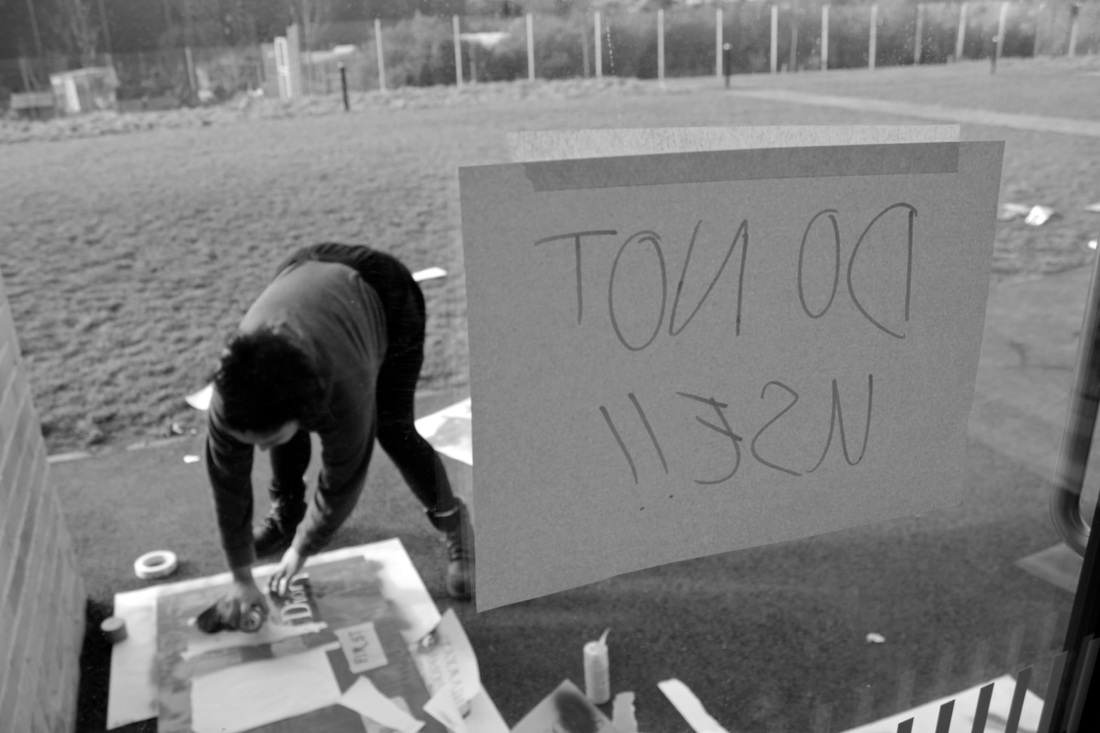
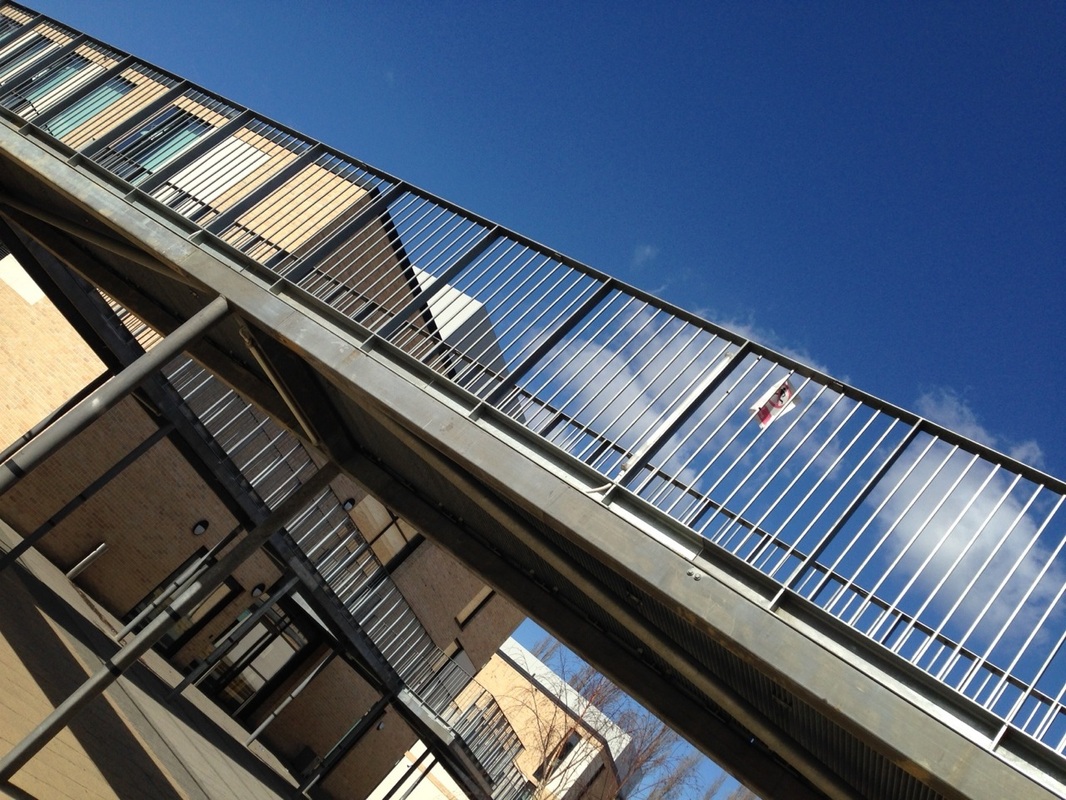
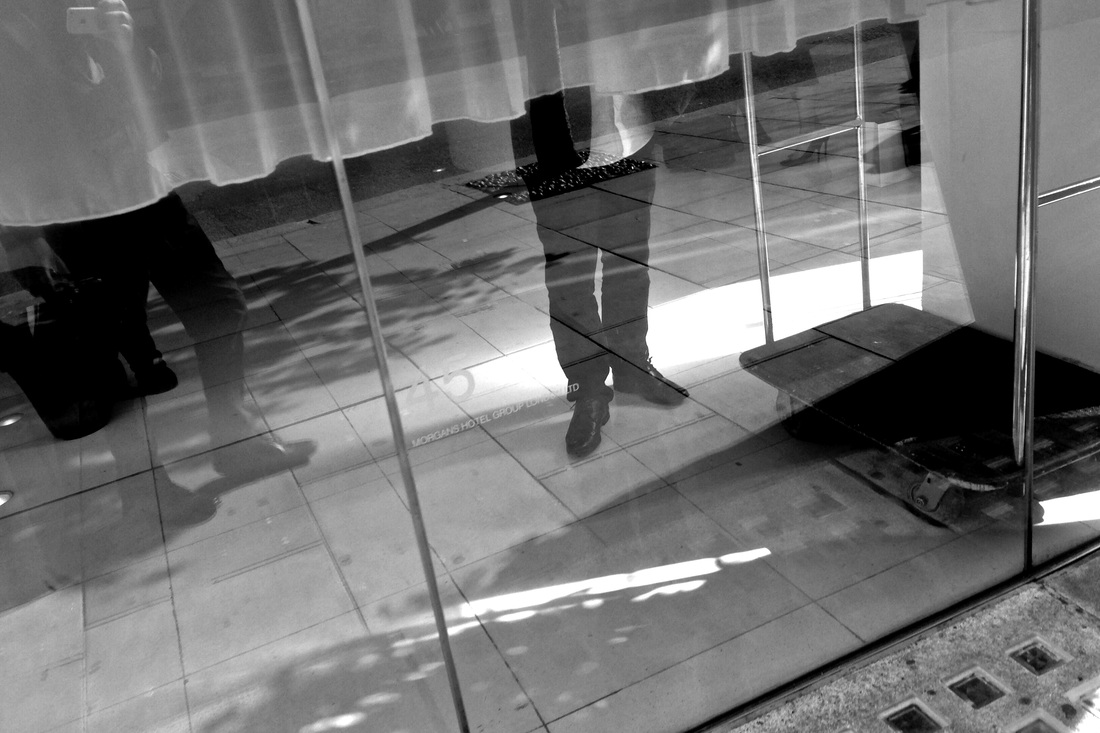
WWWI like this image. There is an interesting contrast between the back to front sign saying DO NOT USE!! and the student hard at working the other side of the glass. I like the way the lines of the fence at the top of the image are echoed in the lines on the glass at the bottom.
|
|
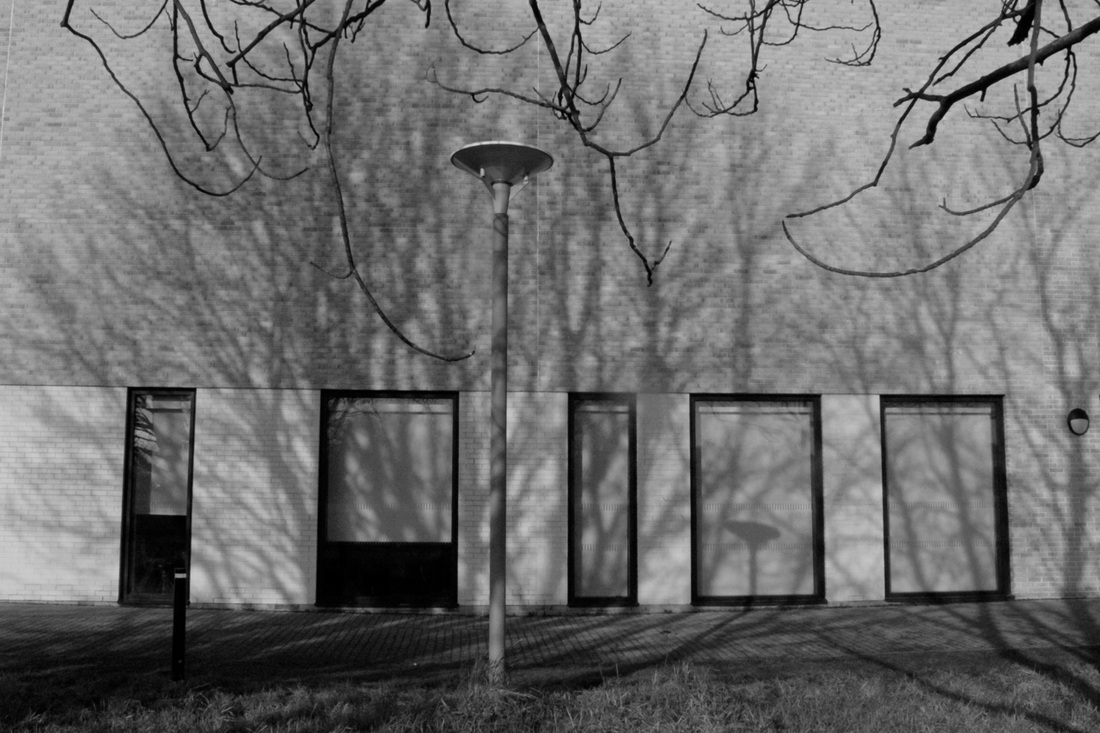
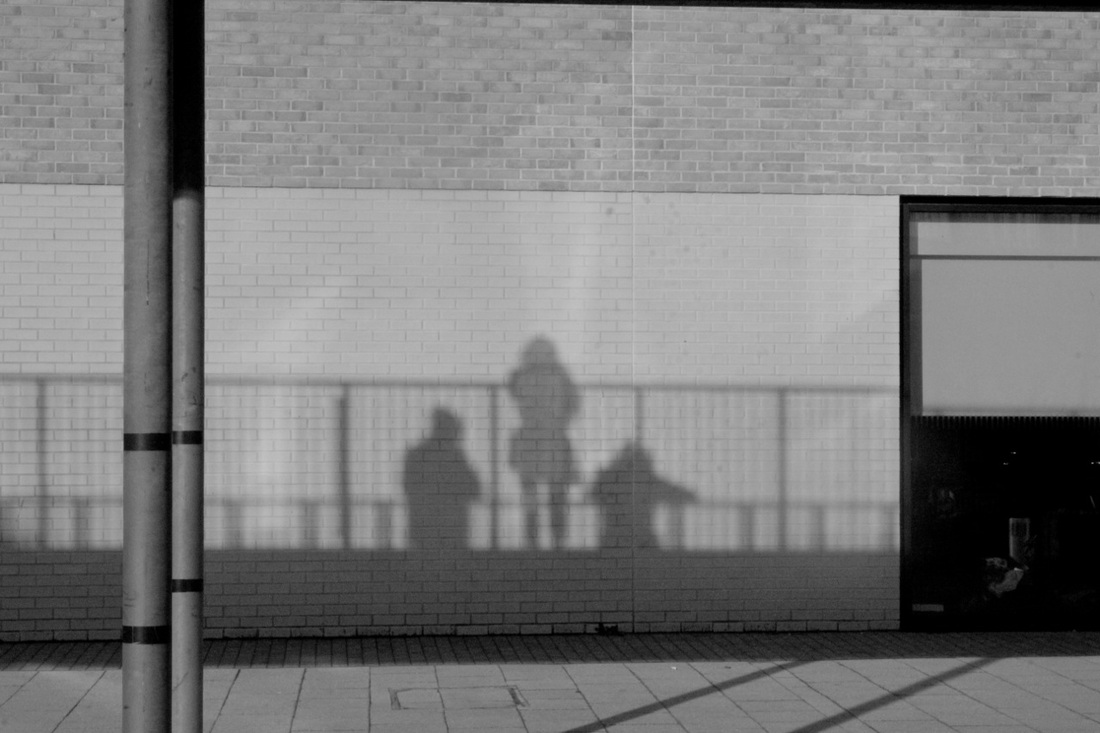
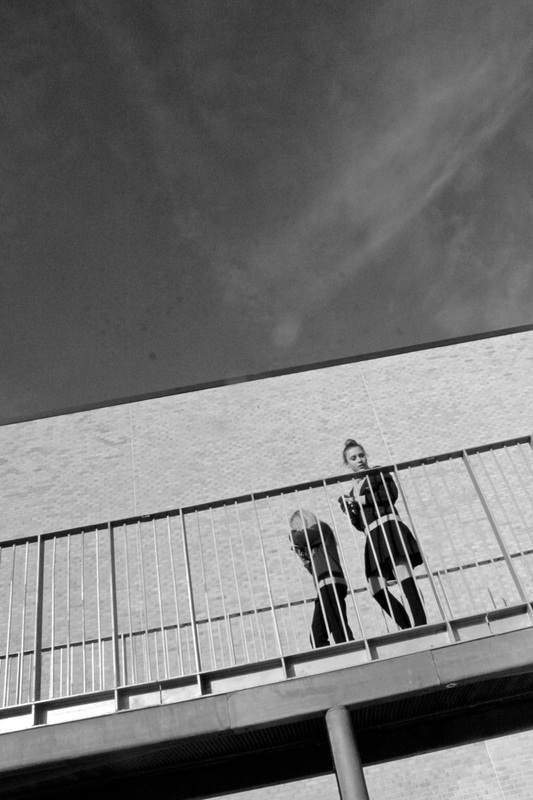
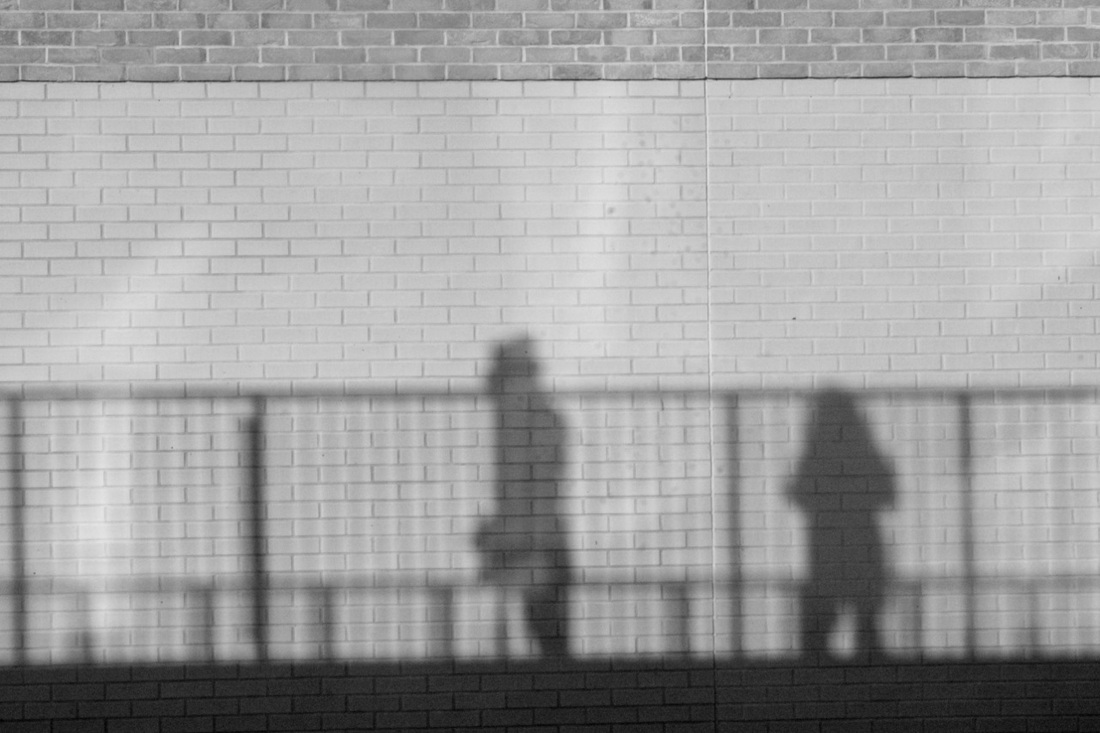
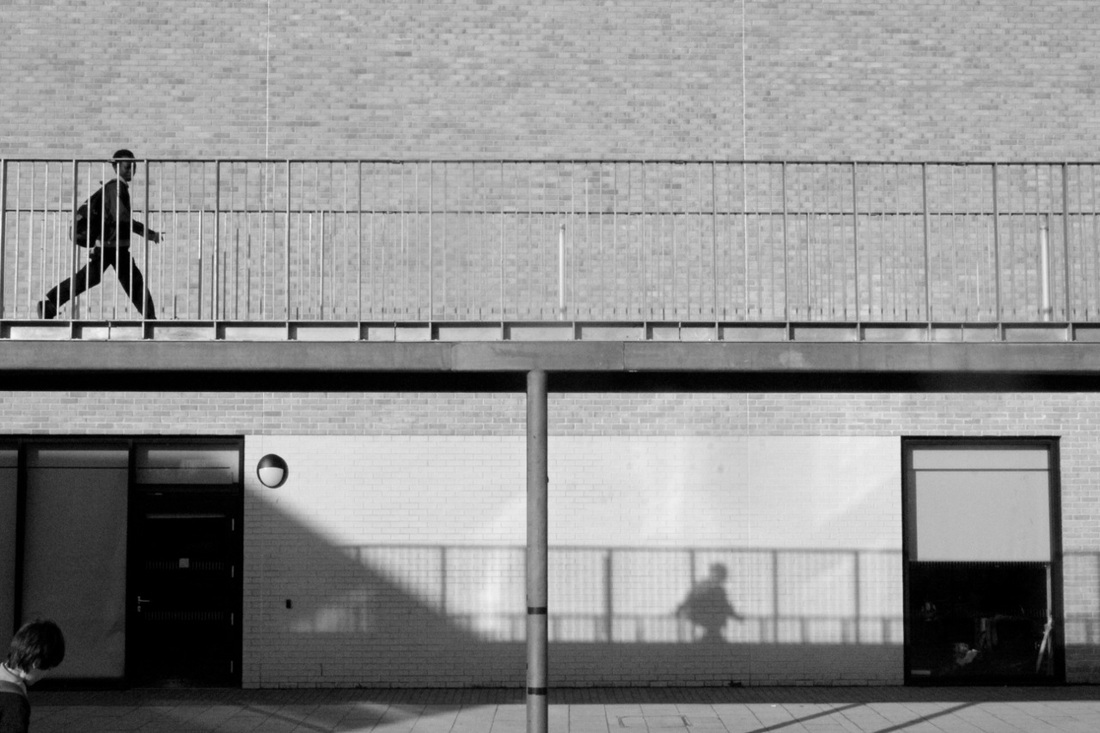
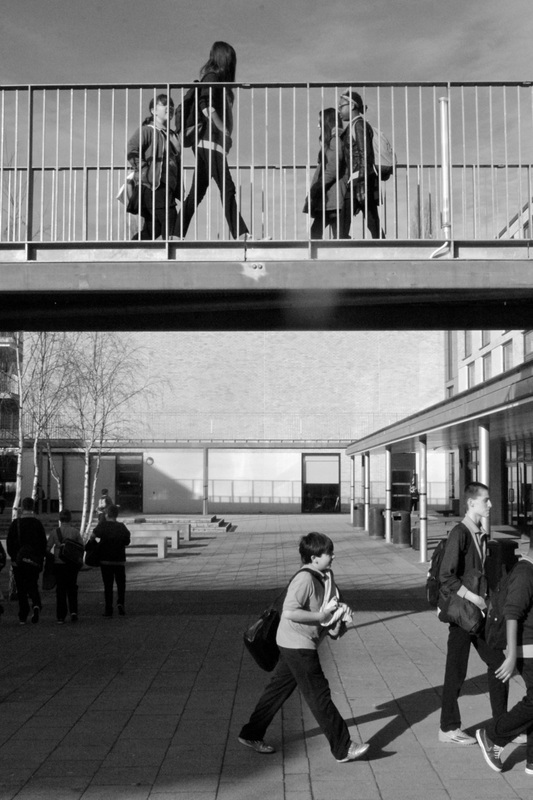
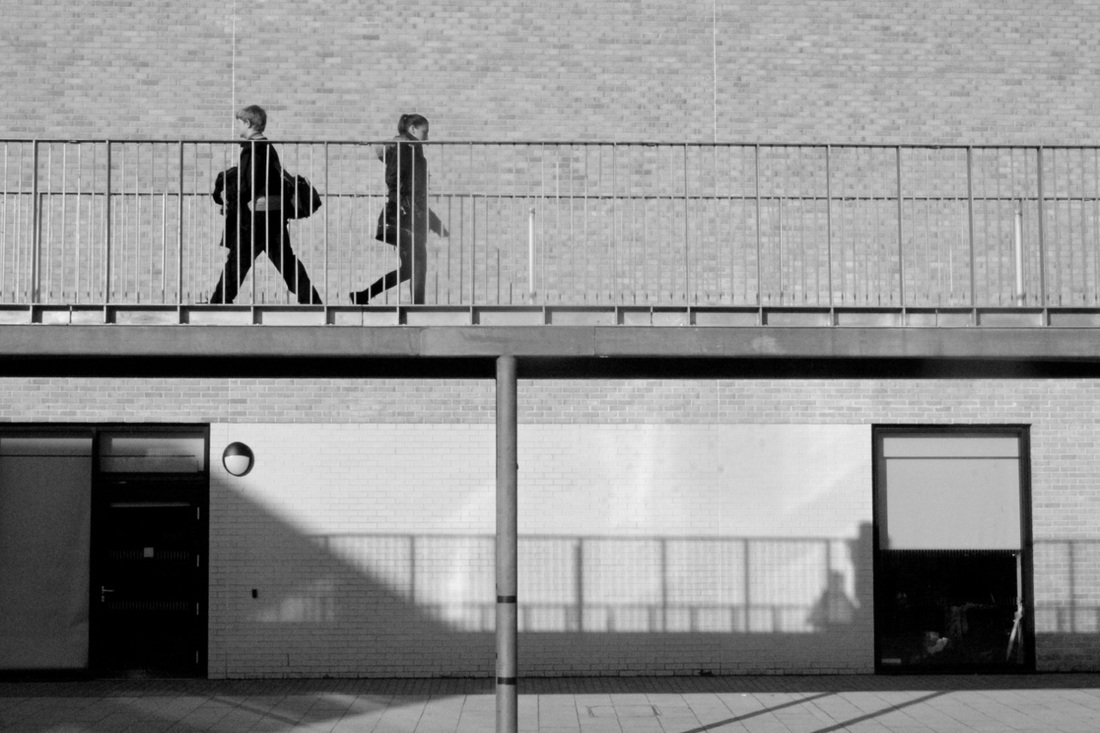
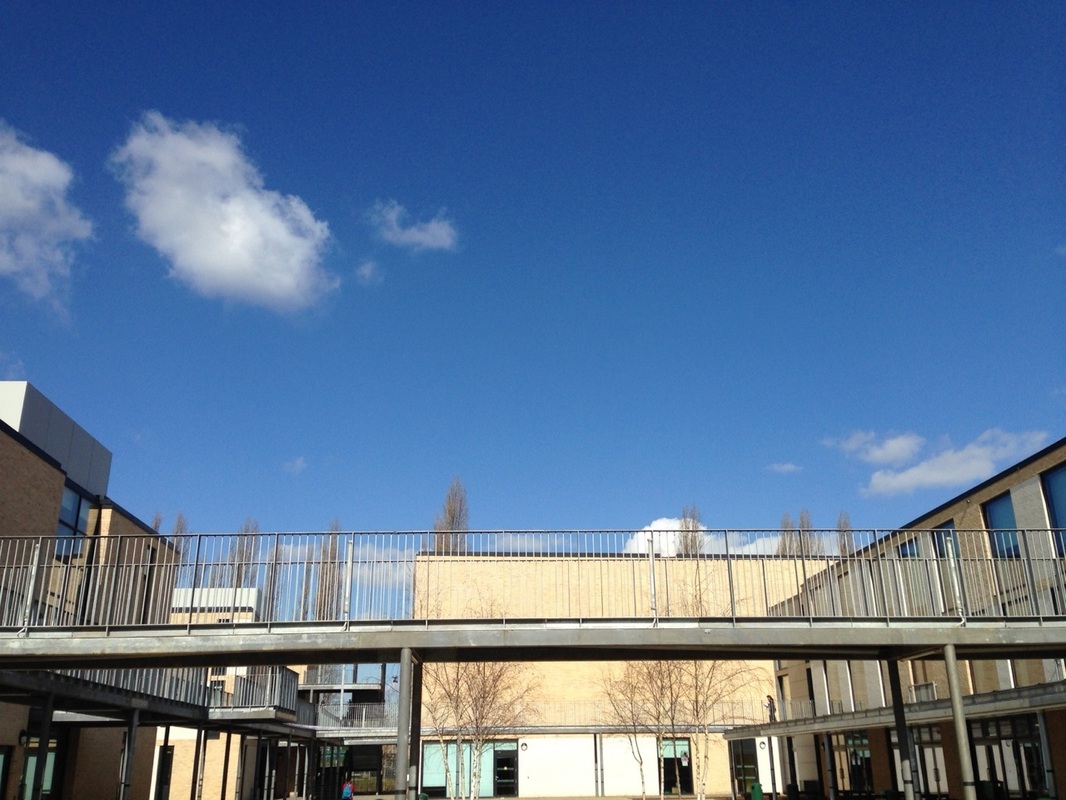
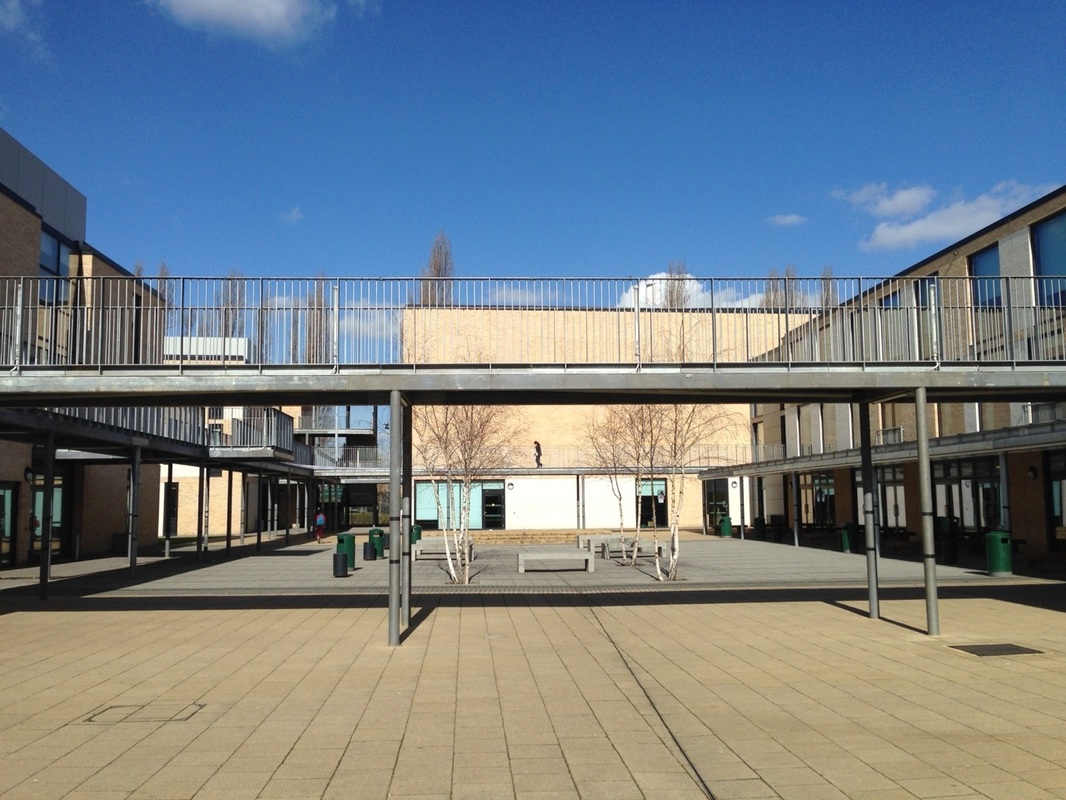
EBII like the way these two figures are walking in opposite directions on the overhead walkway. However, I was trying to capture their shadows on the wall behind but I didn't time my shot well enough and they are slightly obscured by the window bottom right. Also, the post supporting the walkway is too central. It would have worked better I think if it had been on one of the line of thirds.
|
My favourite street photograph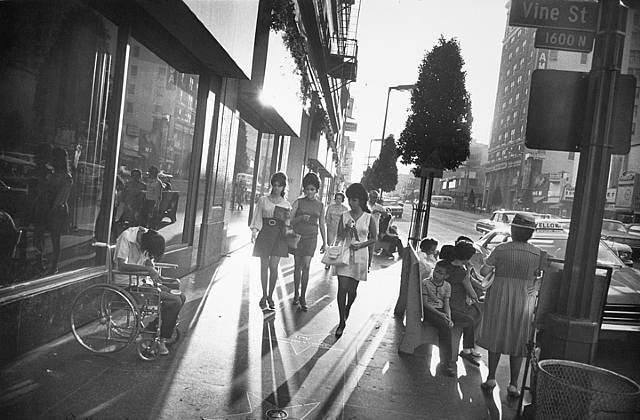
|
This photograph was taken by Garry Winogrand in the 1960s in the USA. It shows three young women walking down the street towards the photographer. The light behind them casts long shadows towards us. They are reflected in the glass to their right along with other people on the street. They are about to pass a man in a wheelchair on one side and a group of children sitting on a bench on the other. One of the children, like the three women, is staring at the man in the wheelchair. I like the way the picture captures these three different groups. We can see the whole scene, just like the photographer. There is so much information to take in due to the fact that the photographer has used a wide angle lens. The light is beautiful, making an ordinary street scene seem almost magical. |
Photo Challenge #2 - Bruce Gilden
|
|
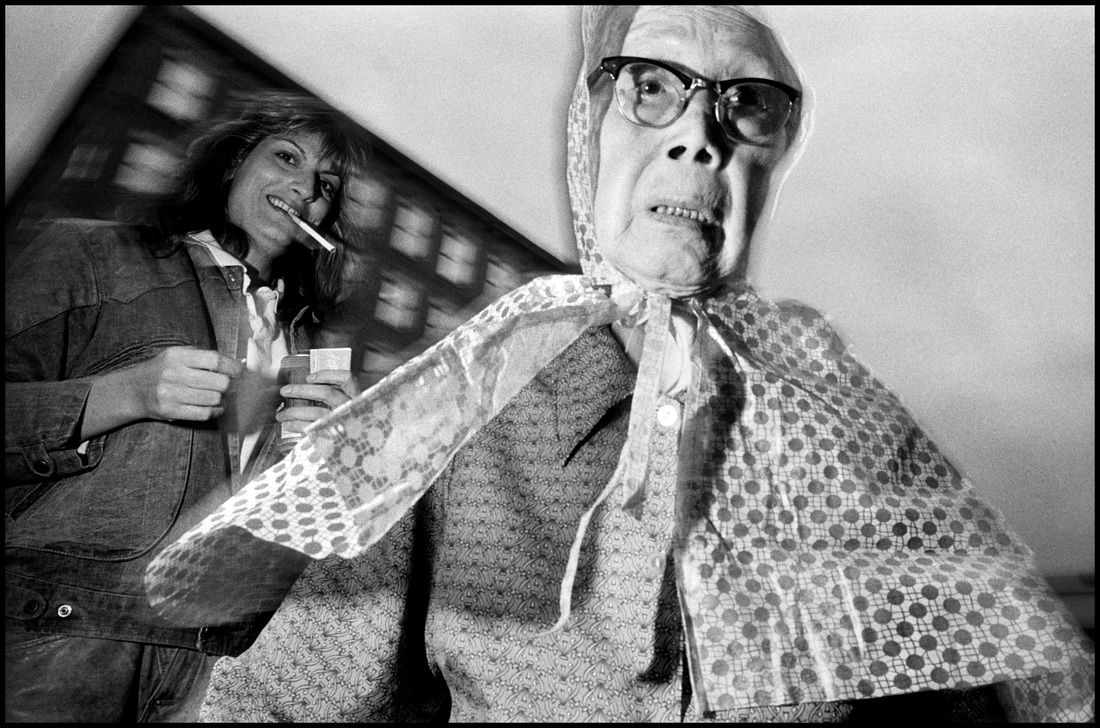
Bruce Gilden is a member of the Magnum photo agency and a famous street photographer who mainly works in New York city. He is famous for his confrontational approach, pouncing on unsuspecting pedestrians and shooting them at very close quarters using an off camera flash.
There is usually a sense of movement in his pictures created by a slower than normal shutter speed combined with a much faster burst of bright flash light. This ghosting effect and the strange distortion of the wide angle lens is typical of his street style. |
Look carefully at this image. Add it to your site. Write a few sentences about it. What strikes you as interesting or unusual about it? Think about:
- wide, low camera angle
- light sources
- movement (ghosting effect)
- closeness of photographer to the main subject
- people's expressions
- 'character' - emotion, expression, drama etc.
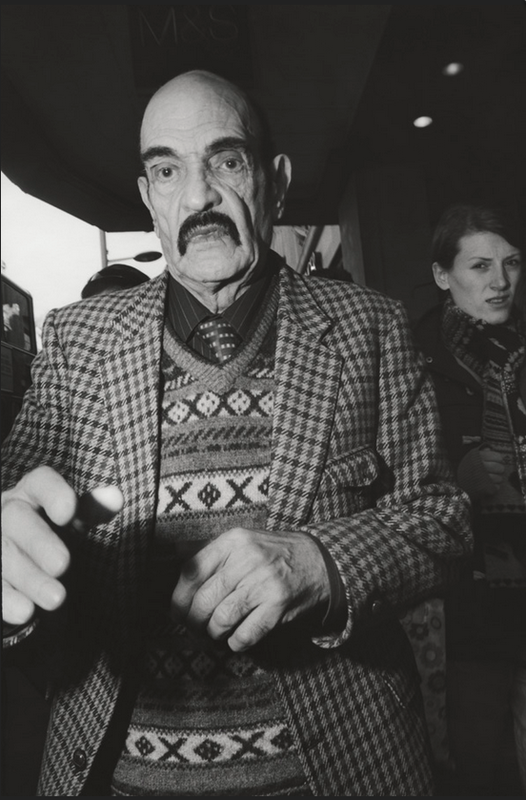
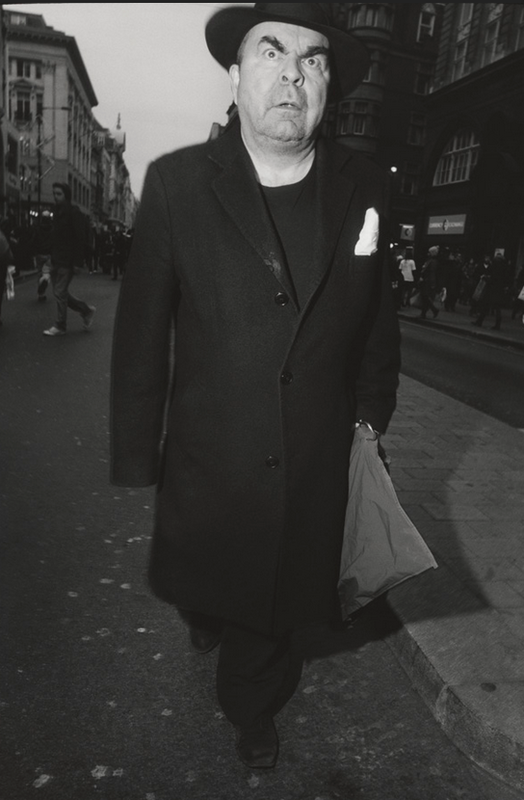
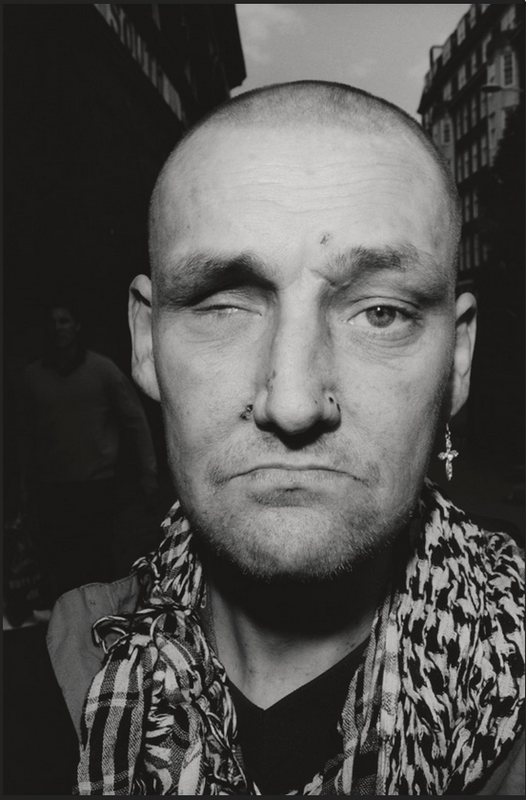
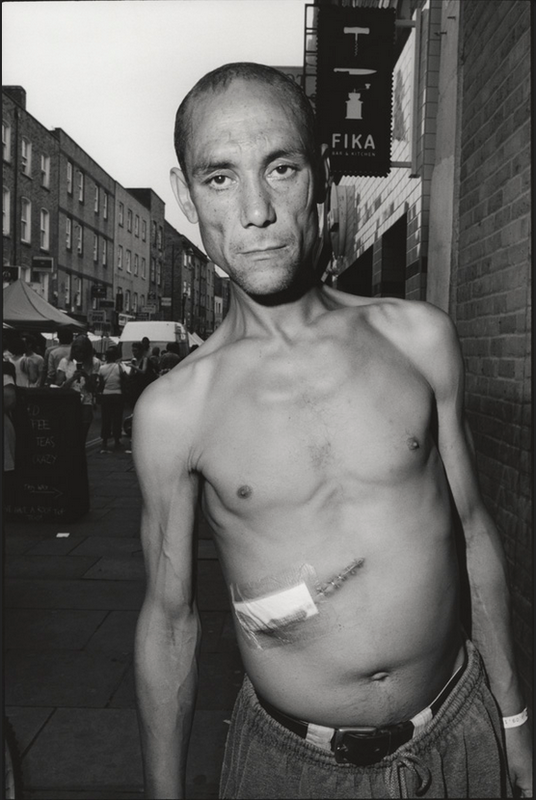
Here are some of the images he has taken in London.
- What is interesting, unusual or surprising about these images?
- How would you feel trying to make pictures like these?
- How do you think the people in the picture felt about being photographed like this?
- How do you feel about Bruce Gilden's approach to street photography?


Your challenge is to experiment in groups with creating images inspired by Bruce Gilden. You will need to:
Post these images to your website as a new Gallery and evaluate them (WWW/EBI)
- work out how to use the on camera flash and slower than usual shutter speeds (Manual settings)
- how to collaborate being both photographer and subject
- how to be persistent when things don't go well
- how to develop your technique so that you get increasingly more successful images
Post these images to your website as a new Gallery and evaluate them (WWW/EBI)
Some examples of students' images converted to black and white
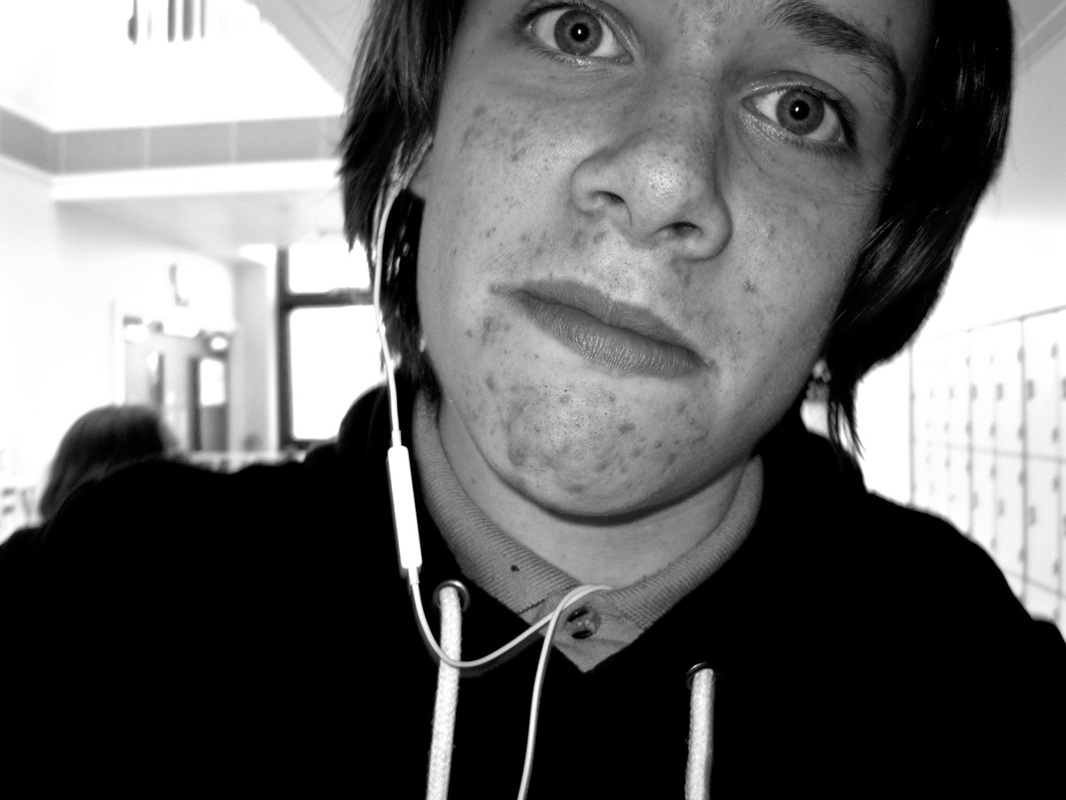
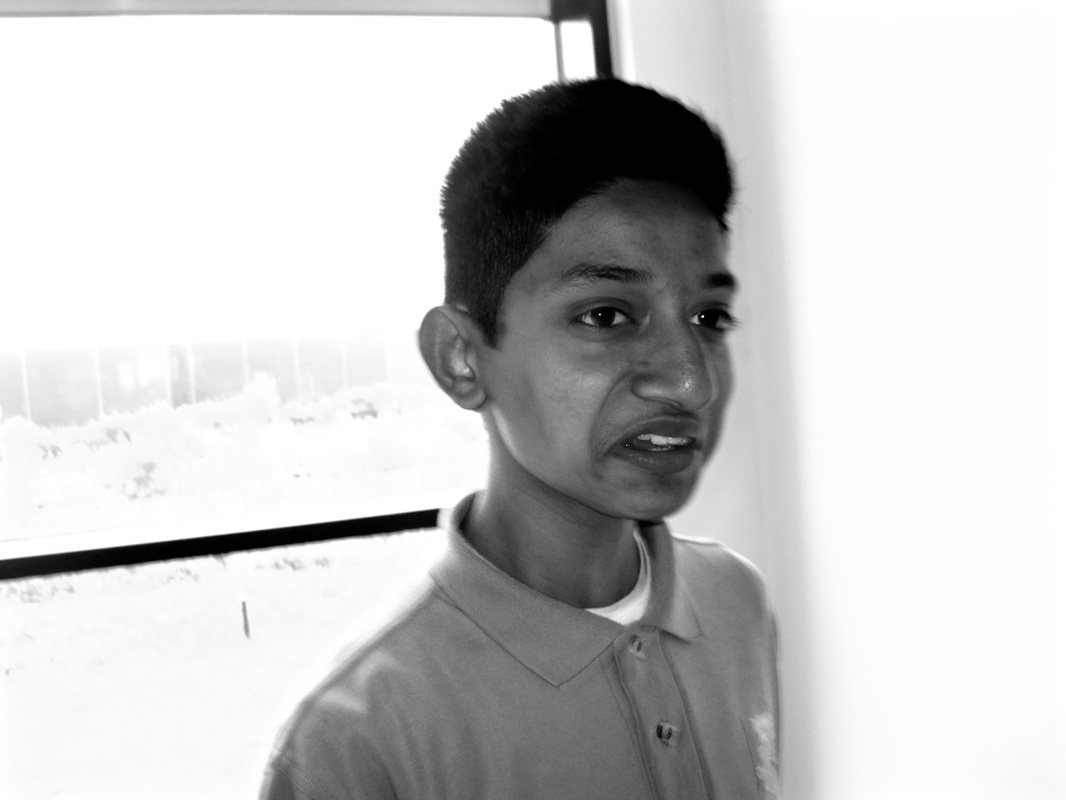
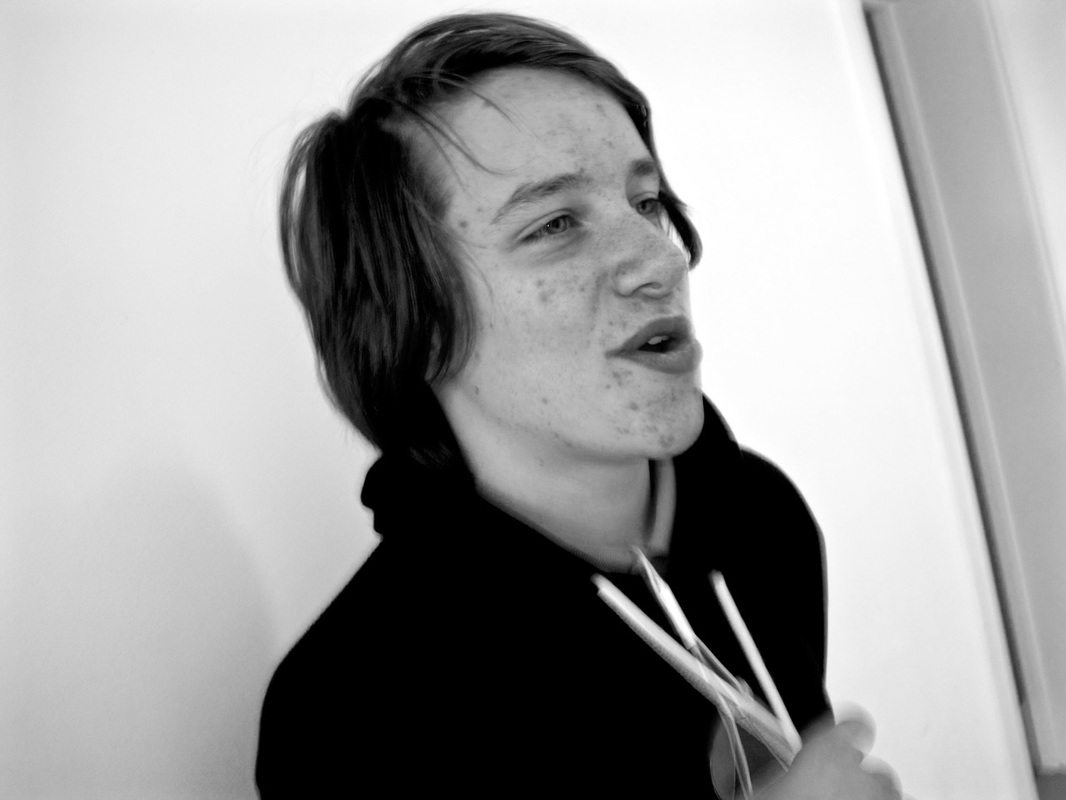
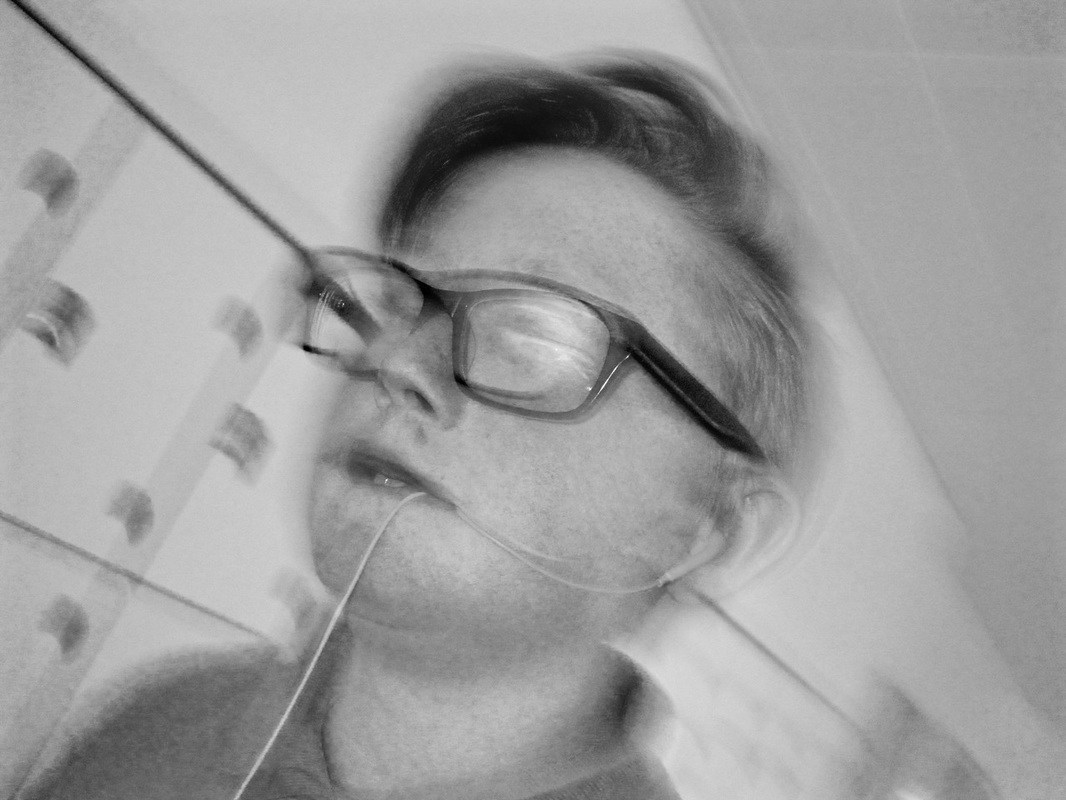
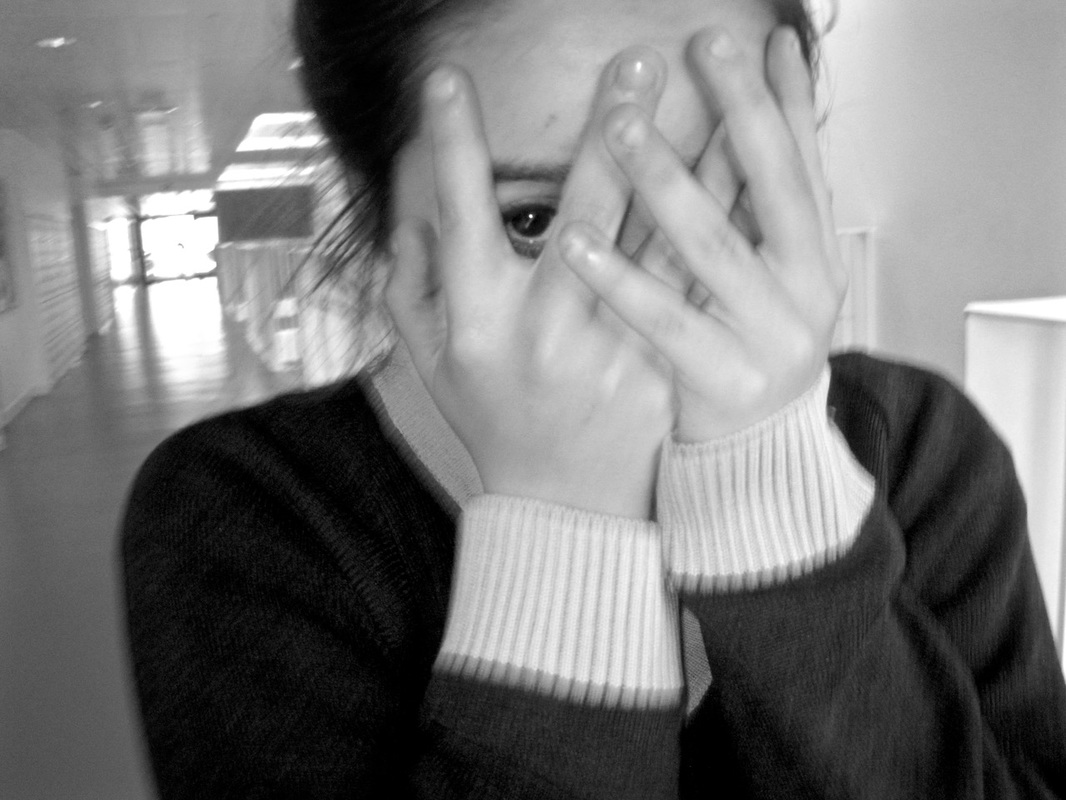

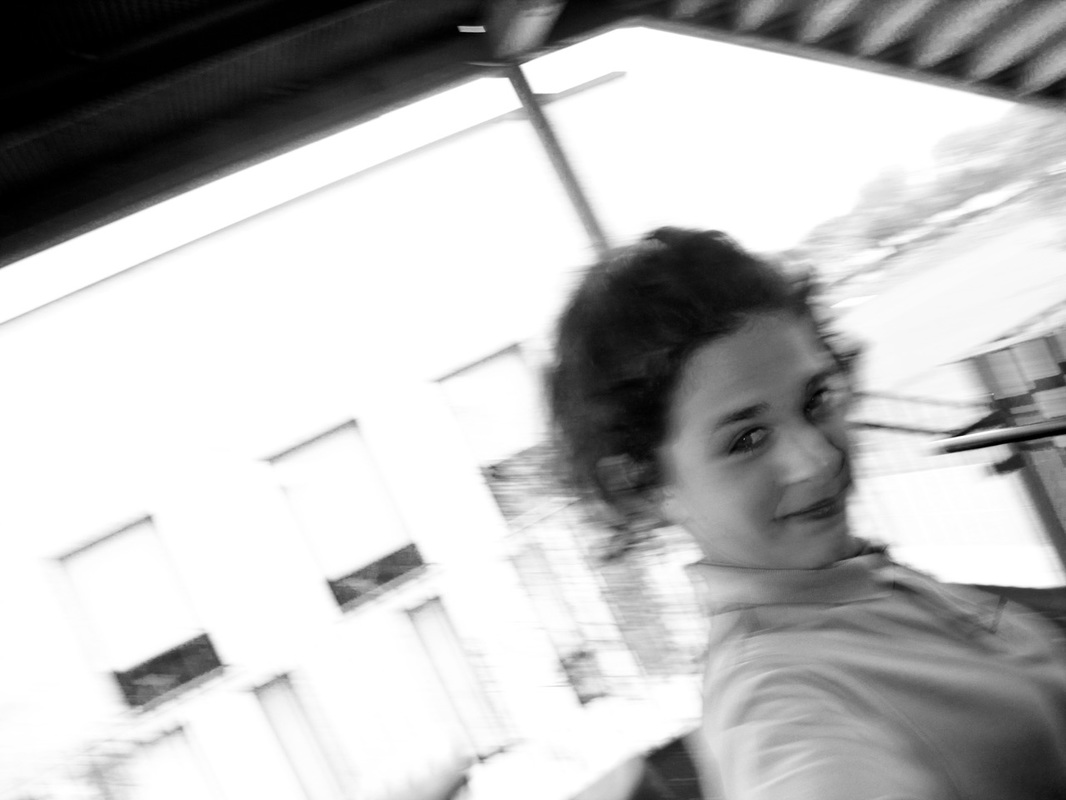
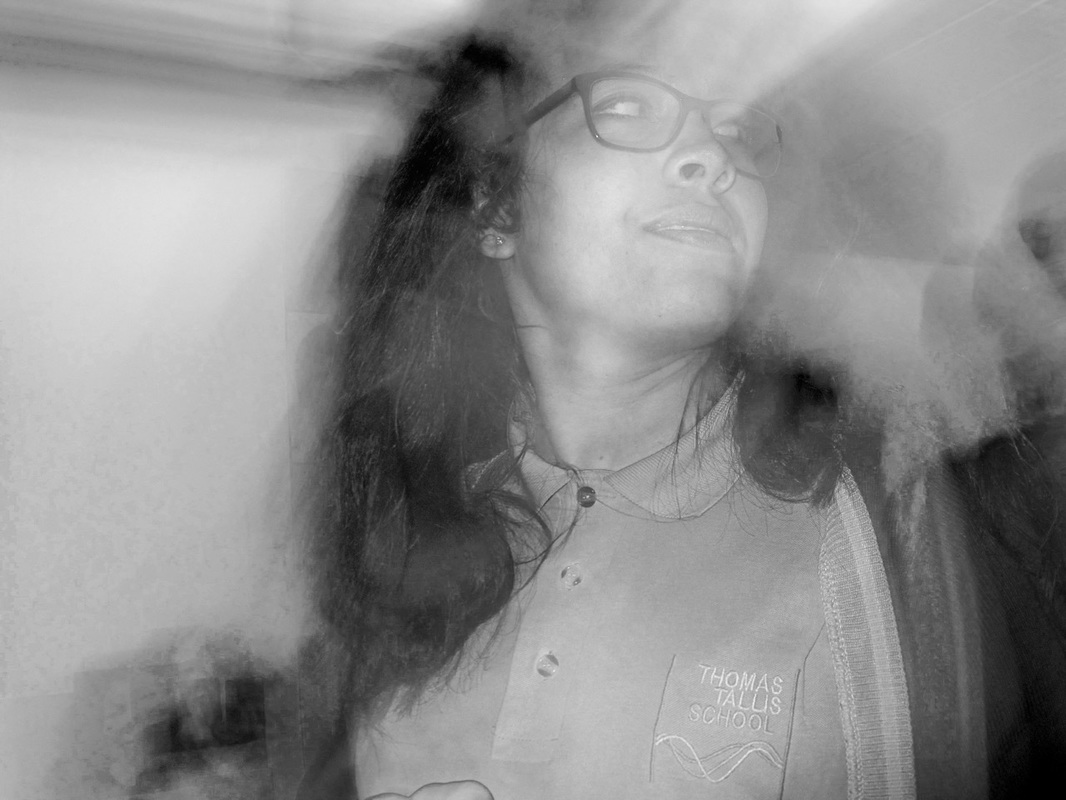
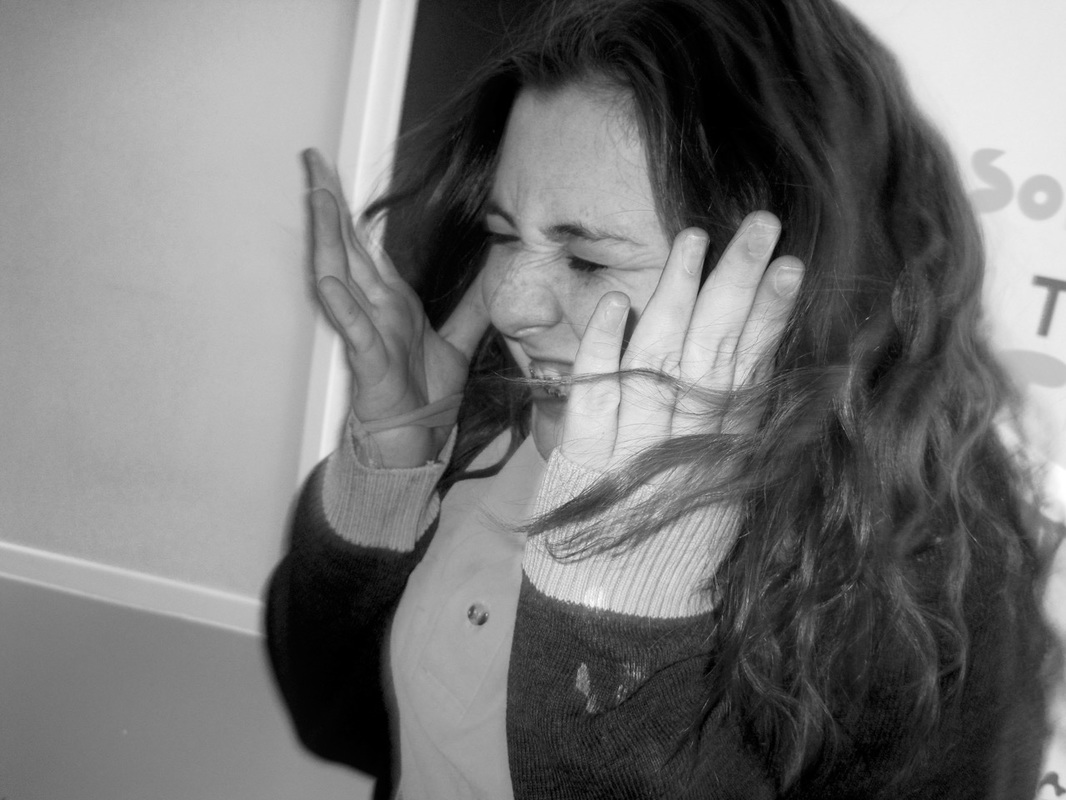
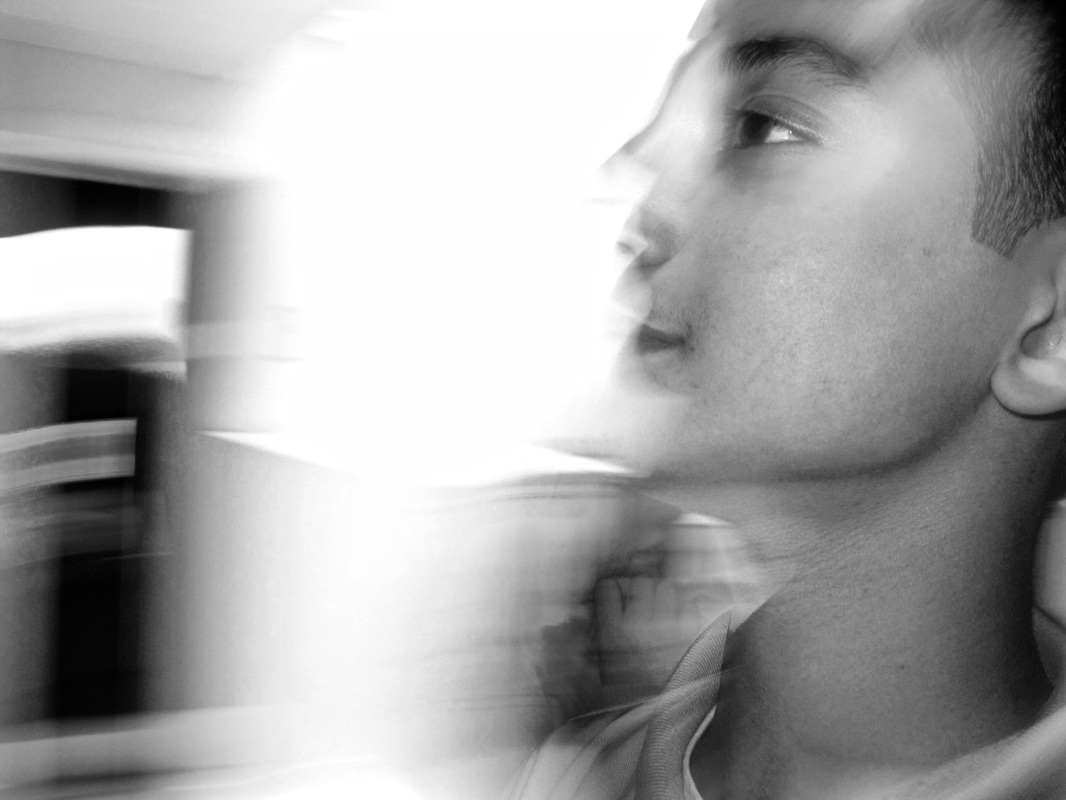


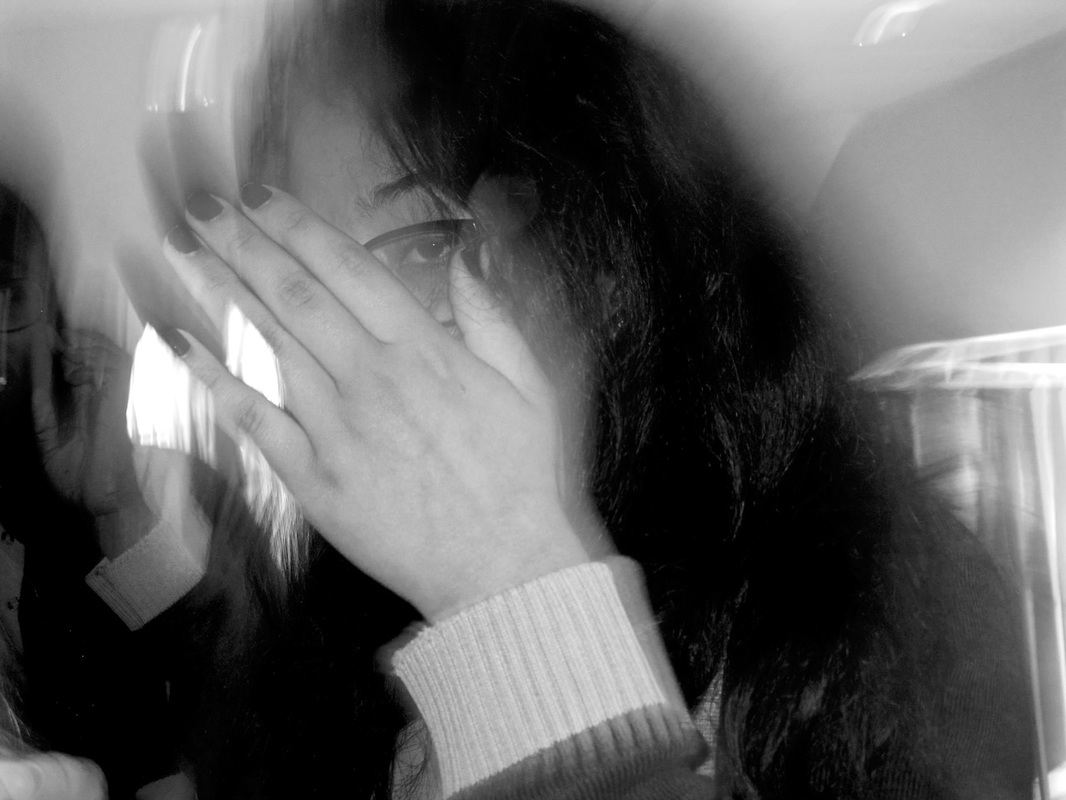
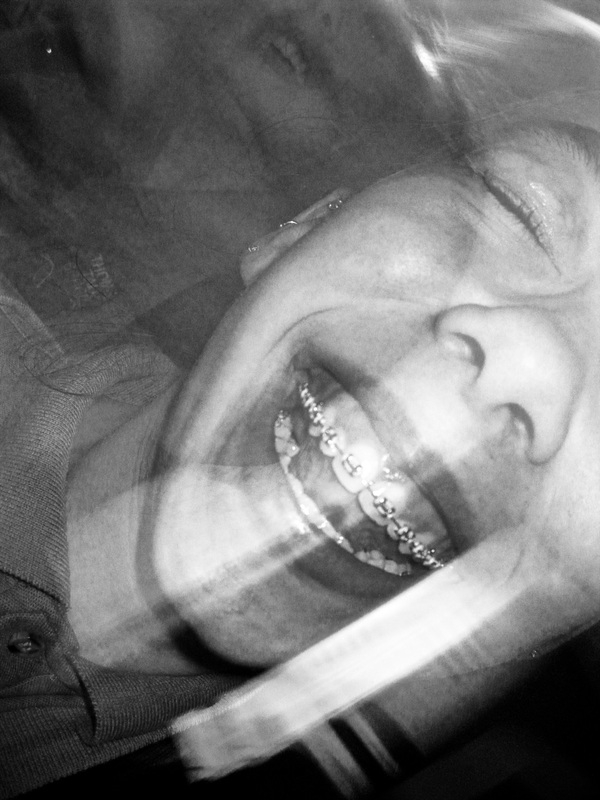
Photo Challenge #3 - Diagonals
|
The idea for this challenge comes from Eric Kim's great street photography site. Street photographs are often about dramatic situations or view points. Drama is created in pictures in lots of ways but using strong diagonal lines is one technique often used by street photographers.
|
© Henri Cartier-Bresson / Magnum Photos. Romania. 1975. In a train.
|
|
Here are some of my favourite street photographs with strong diagonal lines:
|
Here are the pictures I made:
|
WWWI was able to take a series of pictures in which there were strong diagonal lines. I did this by looking carefully for straight lines in the building and tilting the camera to emphasis the angles.
|
EBIIt would have been better to capture more people moving through the spaces. My pictures are a little dark. I could increase the contrast by editing them in Photoshop. I am looking forward to practising on some real streets!
|
Photo Challenge #4 - Rule of Thirds

|
The Rule of Thirds (which is actually more of a guideline than a rule) is an imaginary grid that can help you make better photographs. As you can see in this diagram, your image is divided up into 9 segments by lines placed one third and two thirds across the surface. Some cameras have the option to turn these grid lines on in the viewfinder.
The idea is to compose your shot using the grid lines, the segments and the places where the lines cross to help you. Look at the slideshow below for some examples of how I have used the Rule of Thirds in taking my images.
|
What I learned:The Rule of Thirds is a useful way of making interesting compositions. It helped me think about where I placed the subject and made me look around the edges of the frame rather than just in the middle. I thought about the space around the subject as an important part of the picture. I think my photos are less predictable when the subject isn't in the centre but off to one side. I like the way there is a sense of movement and energy in some of the shots. When a picture is unsuccessful I can see now that it is often because I have not used the Rule of Thirds well enough.
|
|
Cropping for Rule of Thirds
Sometimes photographers may like an image but think that it could be improved by cropping either in the darkroom or using software like Adobe Photoshop. I like this image but I want to improve it using the rule of thirds.
Before

Cropping in Photoshop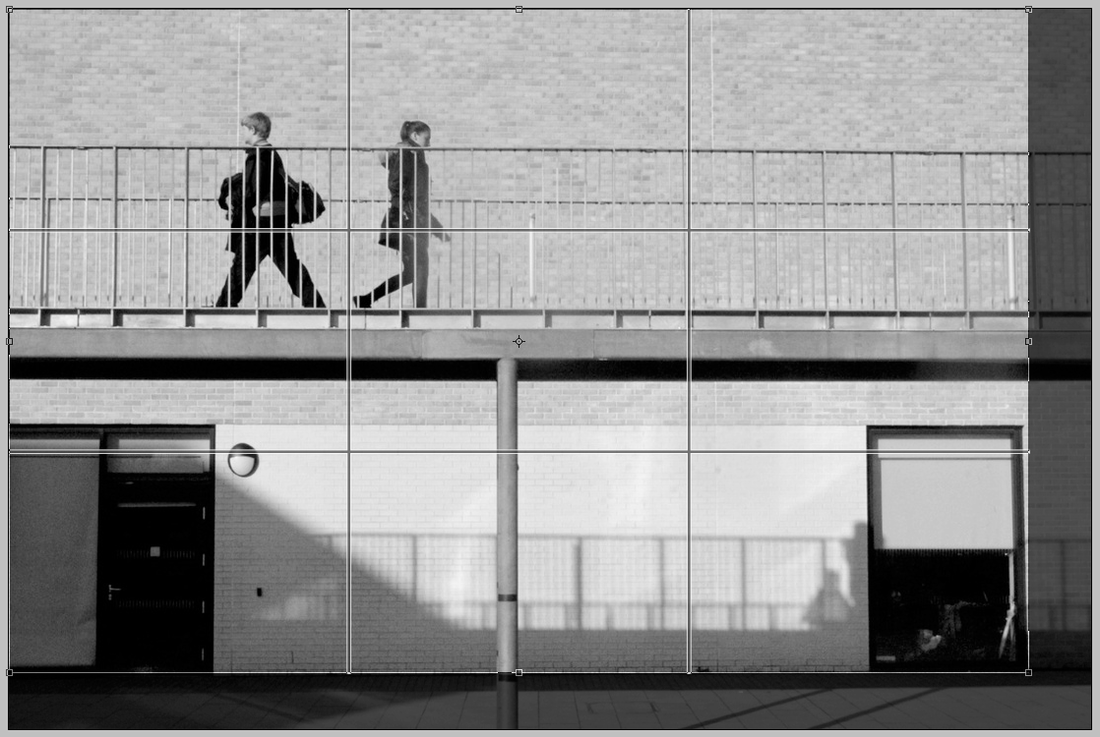
|
The Final Image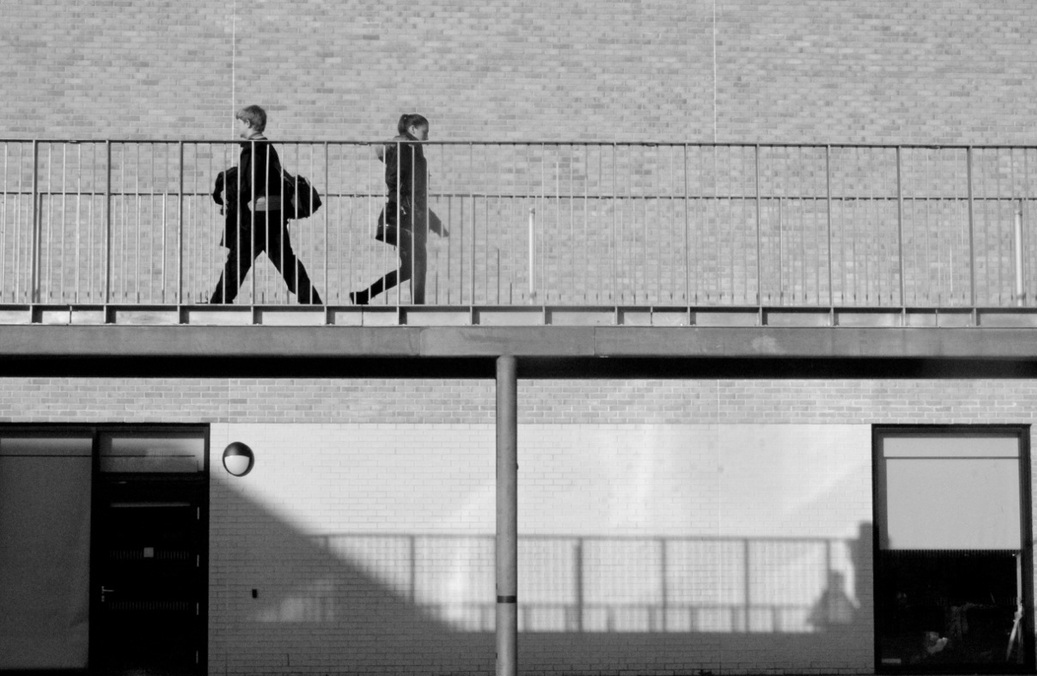
|
Photo Challenge #5 - Compare and Contrast
|
TASK:
Select TWO of the following street photographers:
|
Here are some examples of their images to help you decide.
|
Select one image by each of the photographers you have chosen. Using the two column widget display these two images side by side. Compare the similarities and differences in these images.
Here's an example to help you (you are not allowed to use either of these images):
Here's an example to help you (you are not allowed to use either of these images):
|
|
|
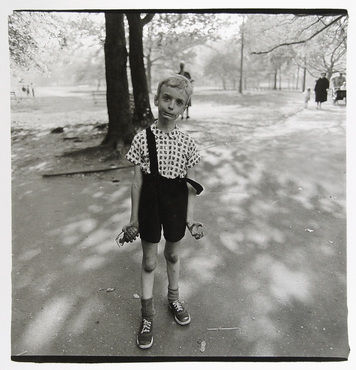
Diane Arbus Child with Toy Hand Grenade in Central Park, New York City, USA 1962
|
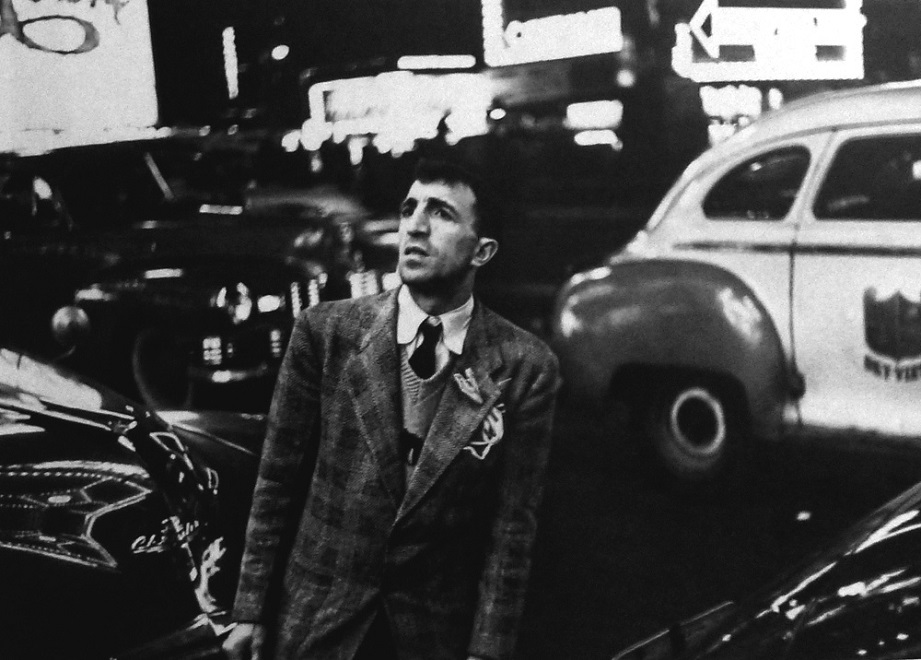
Louis Faurer "Champion," New York City 1948/1949
|
Similarities
Both of these images are black and white street photographs taken in post WW2 New York City. They both feature a single person, a type of portrait of someone encountered by the photographer during an expedition through the city. The figure is relatively central in the image. We can make out other figures in the background but these are shadowy or unclear compared the main subject. Both photographers seem to be interested in patterns made by light: Arbus' camera picks up the pattern made by the shadows of leaves on the footpath and Faurer has captured the pattern of city lights reflected on shiny car paintwork. Both characters have their arms by their sides but have been captured with unusual expressions on their faces, as if they are experiencing strong emotions. Both appear to have their fists clenched. They both seem to be slightly out of place in their surroundings and there is quite a bit of space around them. Both photographers appear to have used available light (rather than adding their own light with a flash). I imagine that both photographers were responding to something they saw but were not necessarily expecting. Part of the skill of the street photographer is to respond to chance and surprise.
Differences
Diane Arbus' picture is square, suggesting that it was taken on a medium format camera with a square negative, whereas Louis Faurer's picture is rectangular which suggests a 35mm negative. The medium format negative is larger and able to capture more detail. Arbus' picture was taken in the daytime whereas Faurer's was taken at night. Faure's picture appears grainy, probably because he was using fast film in low light whereas Arbus' picture is clear and sharp. Arbus has taken her picture in a quiet park whereas Faurer appears to be standing in a busy part of the city with cars and pedestrians jostling for space. The boy looks straight at the camera and seems to be acting a part. He has a toy grenade in his hand. He seems to be playing a kind of game with the photographer. "Look how crazy and dangerous I am!" The "Champion" in Faurer's image does not seem so aware of the camera. He is looking off to the left as if distracted by something outside the photograph. Is he a boxer? He has a boxer's nose and he looks slightly uncomfortable in his clothes. I could certainly imagine him in the ring. Arbus' image is bizarre and funny whereas the mood of Faurer's picture is darker, more mysterious and slightly menacing.
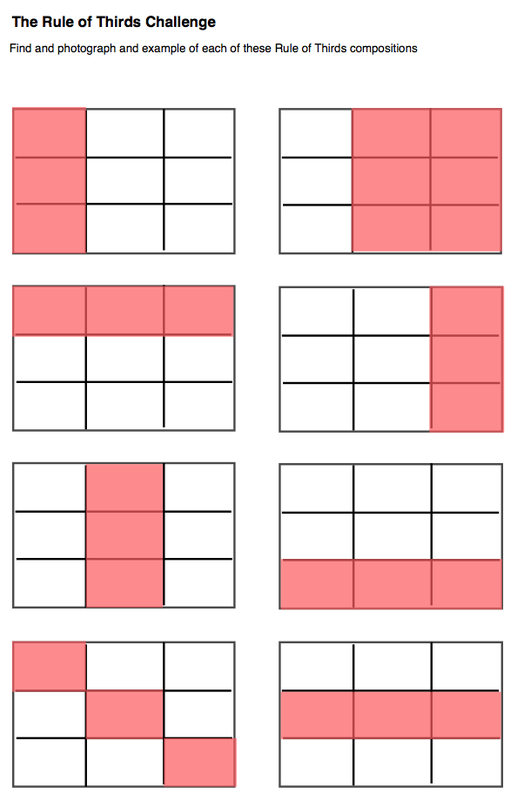
Use the guide opposite to help you collect photos using a range of Rule of Thirds compositions.
Note: The pink section represents the subject, an area where our eyes might be drawn, the main part of the image. The white section should be of less interest, an area of open or negative space, which supports but doesn't dominate the main subject. Supplementary ChallengeAttempt to take 5 photographs that DON'T fit into any of these compositional patterns.
|
|
|
|
For example...Here's a photography of my office.
Which rule of third composition would you apply here? |
What about these examples...?
You choose...
- Remind yourselves of the checklist for your Street Photography page - complete as many of the challenges as you can.
- If you finish them all, I’d like you to choose at least ONE challenge related to Street Photography from the following list (you can do more than one if you have time):
- Research a famous street photographer and summarise his/her style or approach to photographing on the street (you could add a slideshow of typical images to help you explain)
- Find a great film about street photography on YouTube. Embed the film on your page and summarise what you learned from watching it.
- Research a famous book about Street Photography (books have been a really important way for street photographers to share their work). Here are some to start with: Robert Frank ‘The Americans’, William Klein ‘New York’, Henri Cartier-Bresson ‘The Decisive Moment’.
- Find and post your favourite street photograph. Explain what you admire about it.
Home Learning Challenge: My Street Photographs
WWWI chose to shoot these images with my iPhone using the CrossProcess app. I like the way the app applies a filter that changes the intensity of the colours and adds a vignette around the edge. I have tried to experiment with different angles and viewpoints, influenced by the street photographs I have looked at by famous photographers. I like the fact that some of the images include blurry subjects because it suggests the fast pace of life in the city. I like the strong colours, deep shadows and unusual light in a lot of the pictures. Using a phone helped me take images quickly and secretively.
|
EBIThe CrossProcess app applies the filters randomly so it was sometimes difficult to control the effect on the image - some are too dark and others too light. Next time, I might take the pictures with the camera app on my phone and apply the effects afterwards. If I had used a DSLR the images would have been higher quality.
|
Photographers' Gallery Trip - September 2014
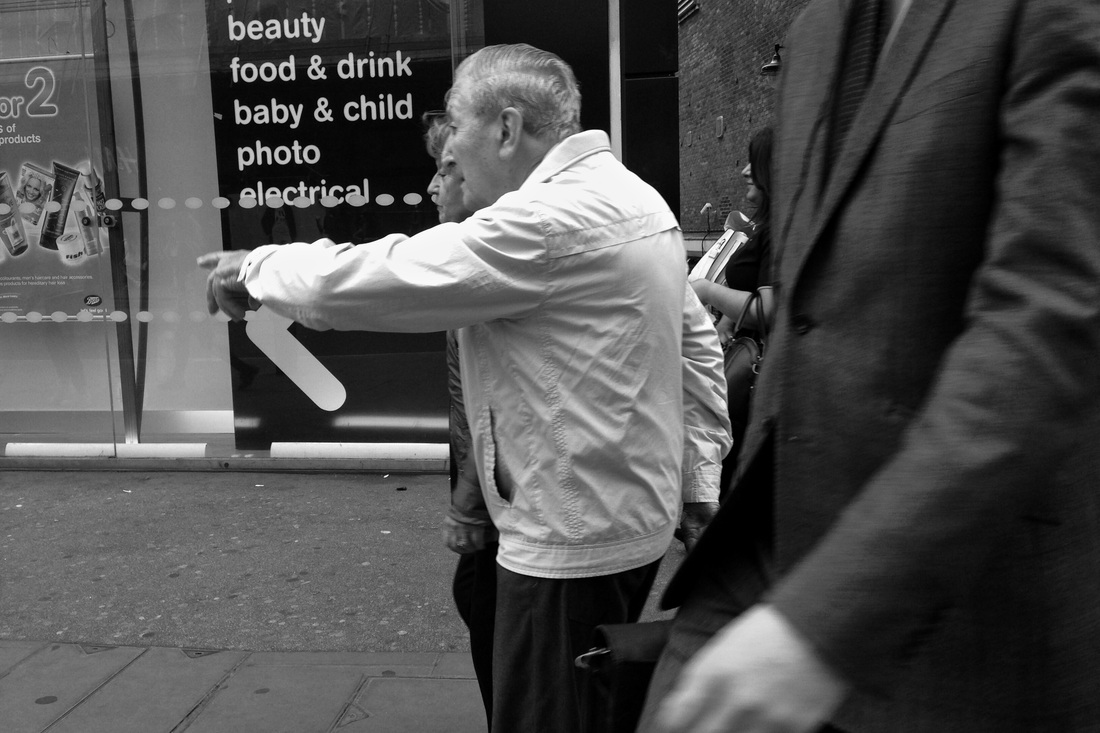

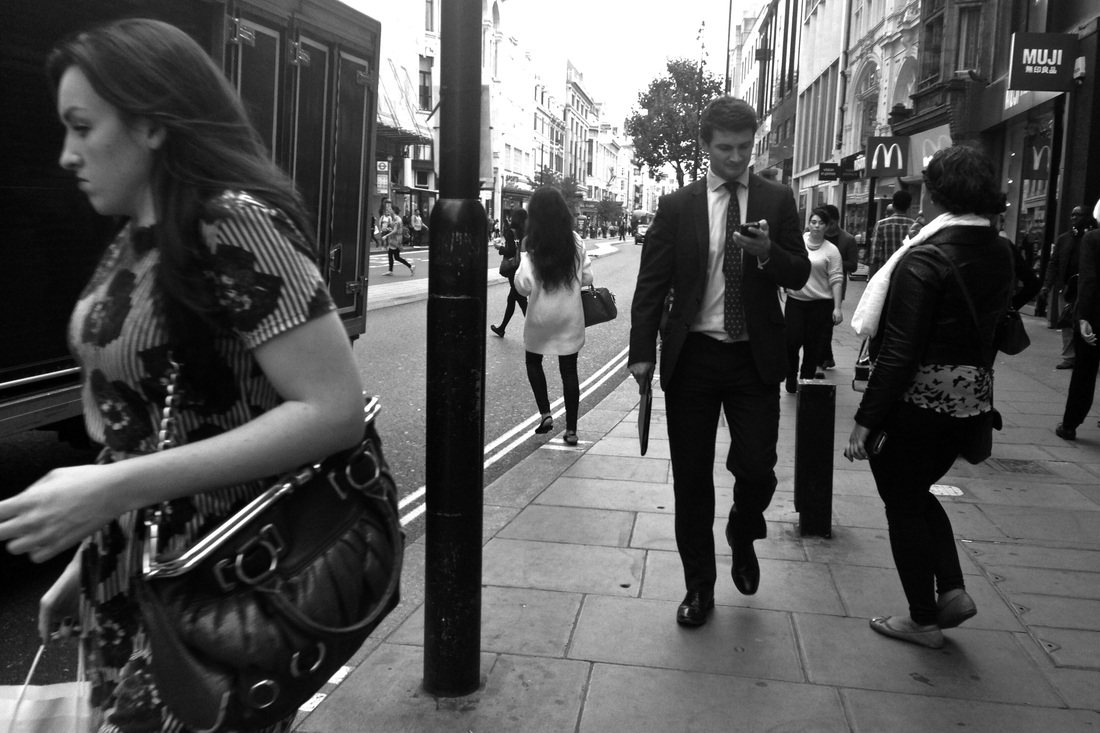
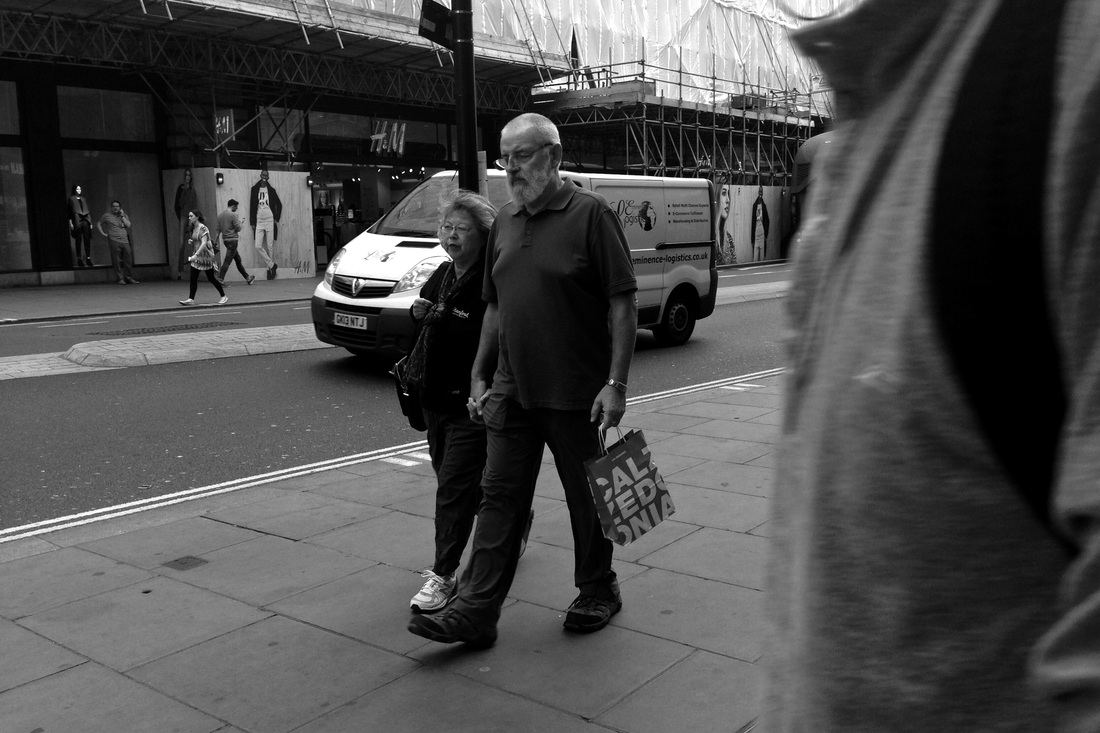
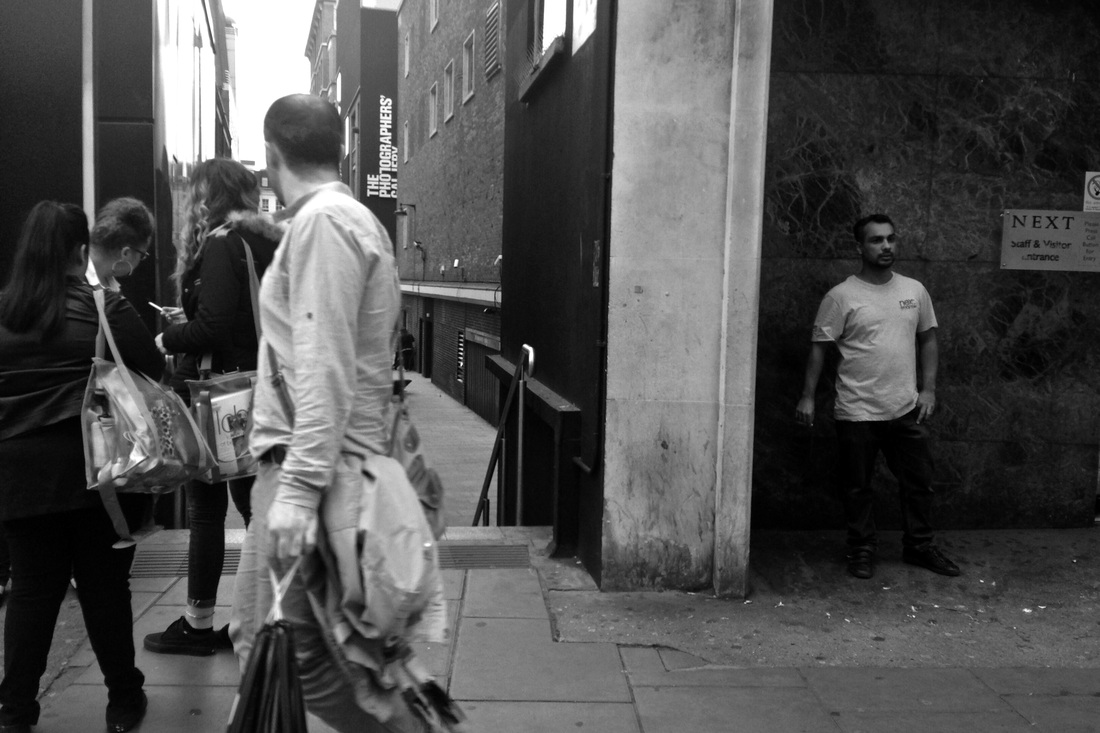


My favourite images